The Background
Moisture Laden Heritage Building (Façade + Ground + 3 Floors + Roof)
Planning for Home Renovation
- Old Heritage Type Building
- Major Investment approx Rs. 12 – 15 lacs
- Source of Damp / Seepage not identified
It made sense to do a thorough Damp / Seepage Inspection through Thermal Imaging – Infrared Technology
The entire western side of the building (all floors) had significant moisture / damp damage
- Ground Floor: Walls of bathroom had stains and musty smell due to build up of moisture. Besides the visible stains the infrared image of wood panel inside the bathroom showed moisture seeping in.

- First Floor: Walls of bathroom had moisture presence. Ceiling of Bathroom had cracks.

- Second Floor: Walls of bathroom-1 had crack above the window indicating deterioration of the wall due to presence of moisture. Ceiling of Bathroom-1 had Fungal deposit. Walls of bathroom-2 had Hole in the wall and external clamps and peeling of paint was also noted which indicated moisture presence.


- Third Floor: Besides visually noted, water intrusion was also seen by the infrared measurement at all the walls along the West and North end rooms and bathrooms.

- Roof: Major Damage and Issues Observed – Significant amounts of debris, Constant flow of water noted under the water tanks and near drainage pipes, Cracks, Uneven finishing, Hollow masonry structure.
Severity of the damage increased as we went on higher floors (Western side of the building)

Source Identification
After a thorough check up of the said areas, we reached the roof. And Voila! We found the source:
Roofs, parapets and other exposed parts of a building are most susceptible to rain penetration, especially where access for maintenance is difficult. Junctions in roofs are potential trouble. Hairline cracks in pointing and render invariably admit moisture.

- Significant amounts of debris were noted near lift machine room (LMR) where rain water was found stagnated and understood to penetrate the weak areas in the parapet walls.
- Cracked and unevenly finished Wall – floor junction huller was noted under the water tank and at the southern end circular projection.
- Beside the tank, the hollow masonry structure was acting as unwanted water storage / pocket. Live and green plant showed presence of significant amount of moisture.
- Constant flow of water was noted under the water tanks and near drainage pipes. Normal cement slab should not be subject to stagnant water. There was also a gap between CI drain pipe and slab, which indicated that water was flowing into the masonry wall then into the drain pipe. And as masonry wall is an absorbent, hence it was absorbing the water and passing the same into the wall below and spreading across the periphery.
Proposed Solution
| Step | Area of Work | Function | Purpose | Repair / Renovation Work |
| 1 | Water tanks and tap at the roof | Plumbing | To Stop Constant flow of water noted under the water tanks and near drainage pipes | Install automatic over flow sensors at water tanks (to be done by professional vendor). The dripping tap to be repaired. |
| 2 | Drain Pipe & Slab at the Roof | Plumbing | To stop the water from entering into the parapet wall at the rain water drainage | Short piece of PVC pipe to be fixed inside gutter, so that flow of water would be: Roof > PVC pipe > vertical CI pipe. |
| 3 | Entire roof drainage lines | Plumbing | To stop the water from entering into the parapet wall at the rain water drainage | Broken CI over flow line to be replaced and connected directly to the vertical CI pipe. |
| 4 | Below LMR room | Plumbing | To check water stagnation at LMR | From the slab below LMR, all materials to be removed, slab to be cleaned and repaired for proper drainage. |
| 5 | Parapet wall | Civil | To check the damage due to growth of green plants, moss and algae at the structure | All growth at the parapet wall to be completely removed and treated with light acid. |
| 6 | Wherever applicable | Civil | To stop soaking of water and developing pockets of water at the bare and hollow brick work | Hollow brickwork to be completely re-plastered with Cement – sand (1:4) mortar with Latex additive and given neat cement finishing. Or It should be filled with brick concrete and re-plastered as above. |
| 7 | Roof | Civil | To stop rain water infiltration from cracks at the roof and parapet wall and the ones developed on removing the plants | Surface preparation / Cleaning – All loose material, dust, debris, oil paint, grease etc. to be completely removed with wire brush. Pre wet the surface with water and allow it dry slightly. As applicable, Cement – sand (1:4) mortar with Latex additive or masonry silicone sealant to be filled and compacted into the cracks. No moisture should be in the crack during filling. |
| 8 | Slab and roof junction | Civil | To make a seamless junction, as Huller at the slab and roof junction is not adequate, | After surface hacking and thorough cleaning with wire brush, 3 inch X 3 inch wall and roof junction fillet to be made on the entire Roof and wall junction. |
| 9 | After completion of the aforesaid, affected areas to be treated as follows:
|
|||
Conclusion: Identifying the source of moisture is the most important step in these cases and also a very critical one. These inspections involve qualified experienced experts. MACJ – A Buyers Choice Home Inspections is glad to be bestowed with such team who can correctly and precisely identify the issue/s with a simple solution/s. We should also applaud the client who proved wise enough to engage MACJ – A Buyers Choice Home Inspections to solve the problem. Not only did the MACJ team solve it successfully but also saved the client from major future damages which would have also resulted in incurring a lot of money. Our recommendations were also pocket friendly.
| Renovation Parameters Before MACJ Inspection | Renovation after inspection By MACJ – A Buyer’s Choice |
| Short term solution as source not identifiable | Long term solution as the source of seepage identified |
| Damage to the Structure | Mostly Non-destructive solution |
| High Cost of Repair / Renovation – Rs. 12 – 15 lacs | Low Cost of Repair / Renovation – Rs. 4 – 5 lacs |
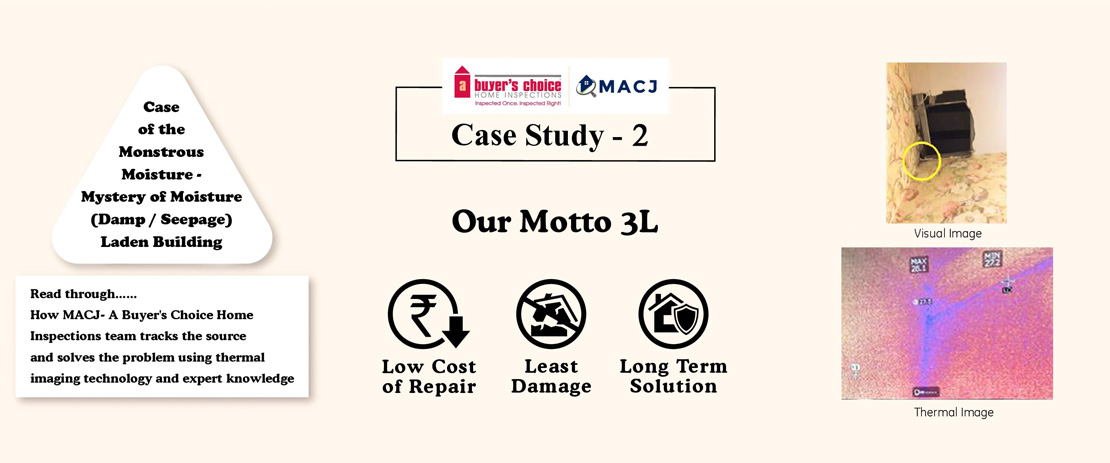
MACJ – A Buyer’s Choice Homes Inspections Motto:
LLL – Long term solution – Low cost of Repair – Least destruction