Festive Home Cleaning: What’s Your Plan?

It is only a matter of a month. You can hear the footsteps of Navratri, the 9 days of celebration, puja, fasting and feasting, decking up yourself and so on. The defeat of Mahishasura by Goddess Durga signifying the win of good over evil is your reason for celebration. When Navratri / Durga Puja is so near, can Diwali be much far? Ayodhya decked up itself with hundreds and thousands of diyas when Sri Ram returned after defeating Ravana. Keeping the tradition alive, Indian homes are also waiting to get lit up. This particular year, amidst the pandemic situation, we Indians are wholeheartedly waiting for the festive season to make its grand entrance in our lives, right?

We get it that you are ready to embrace the festivals around the corner. But is your house ready? Looking for ideas where to start from? Scroll down to get a picturesque idea of deep cleaning for your house this festive season.
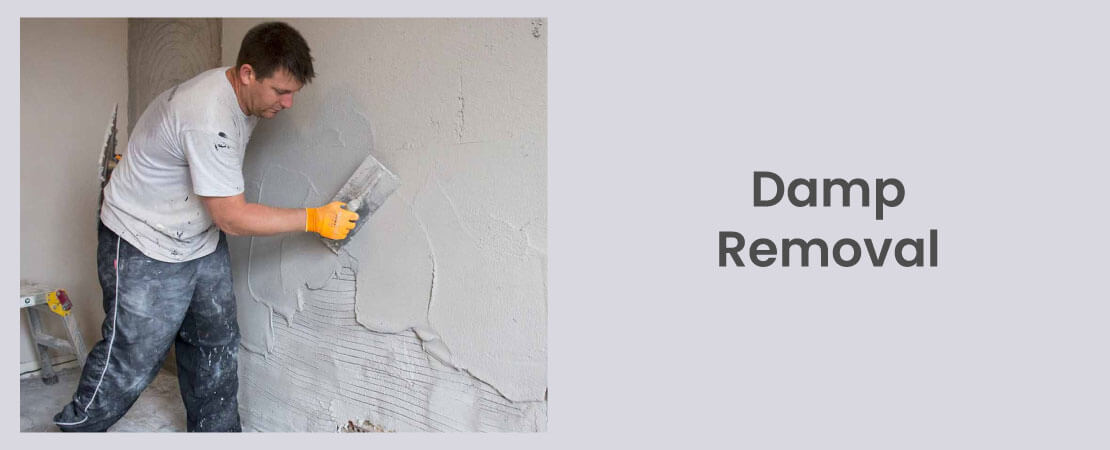
1. Monsoon is retreating! Start with the most important: Damp Removal

The first ‘evil’ that you should get rid of is the damn damp. However sunny and cheery the weather may seem now, it has been drizzling for days just before it. This surely has elevated the damp condition. So what are your plans? Putting up new wallpaper? – Wrong decision, let us tell you. It will come off any day and only add to your embarrassment. Better, you remove dampness from the walls first and then revive its decor. This will not only benefit the interiors but also your family’s health. In fact, you can consult a professional and try to find out the real cause behind the damp so that a permanent solution can be reached at. This will be your most important step of home cleaning before the festivals set in.
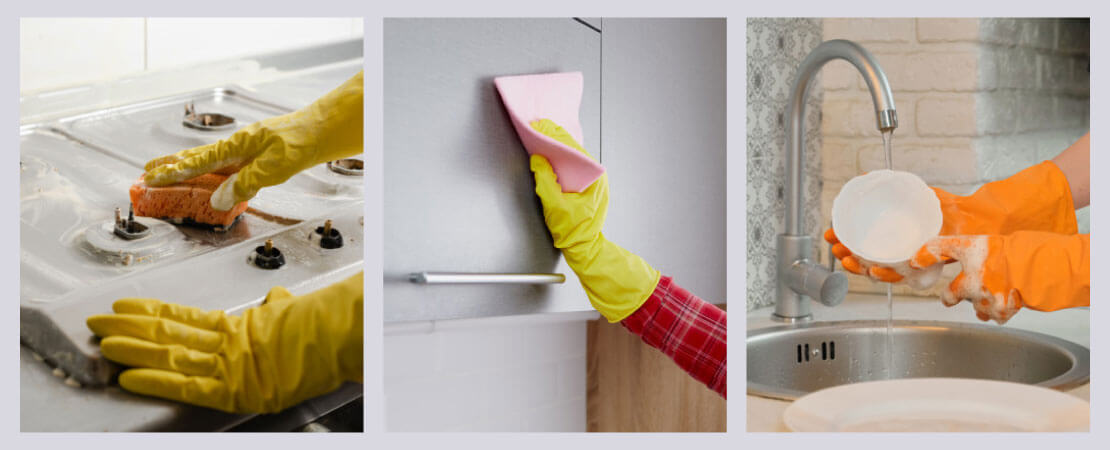
2. Take care of your Kitchen

When we say kitchen, we mean every nook and corner of it. Kitchen safety and sanitation1 is important at any point in time. So, Clean the kitchen cupboards, the containers, utensils- everything. The biggest evil in the kitchen is grease and oil. This cleaning season calls for attention to all those difficult-to-reach areas including the ceiling borders, junctions of walls, behind the shelves, etc. Dirt and cobwebs accumulate behind the appliances also. Move them from their position and clean those areas thoroughly. The insides of appliances can also be equally dirty. Wash them and if required, get them serviced as well.
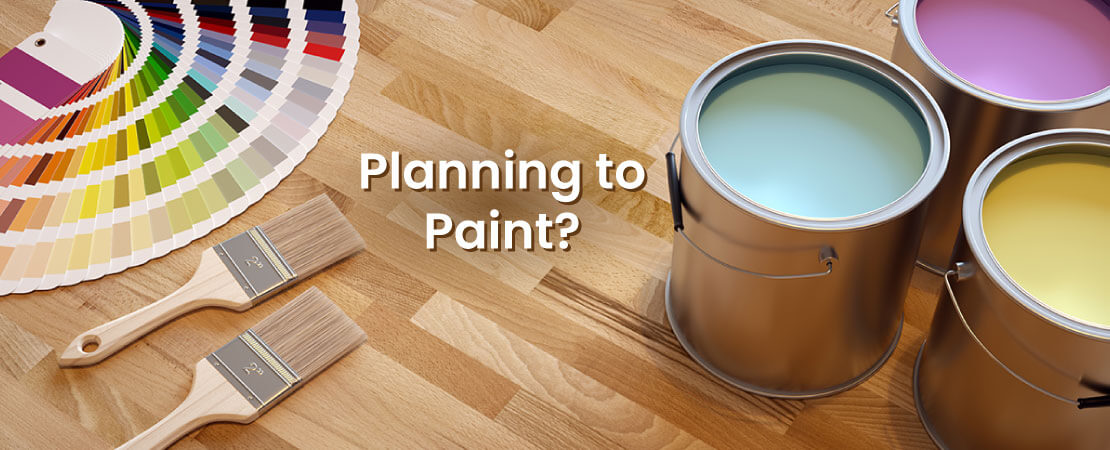
3. Planning to Paint?

If you are buying new clothes for yourself why not give the house a fresh coat of paint? You may give only the exteriors a weather-proof coat or give the inside walls a much-needed makeover. But whatever you do, analyse the condition of the walls first. Is it only a case of fading paint due to a long time gap or is it a result of painting defects in your home? Or, is there something more significant behind the flakiness? Know the actual cause behind the problem and then go for a repaint. Take proper precautions, choose the right paint and shade and make your home ready to welcome Lord Ram and the Goddess Durga this festive season.
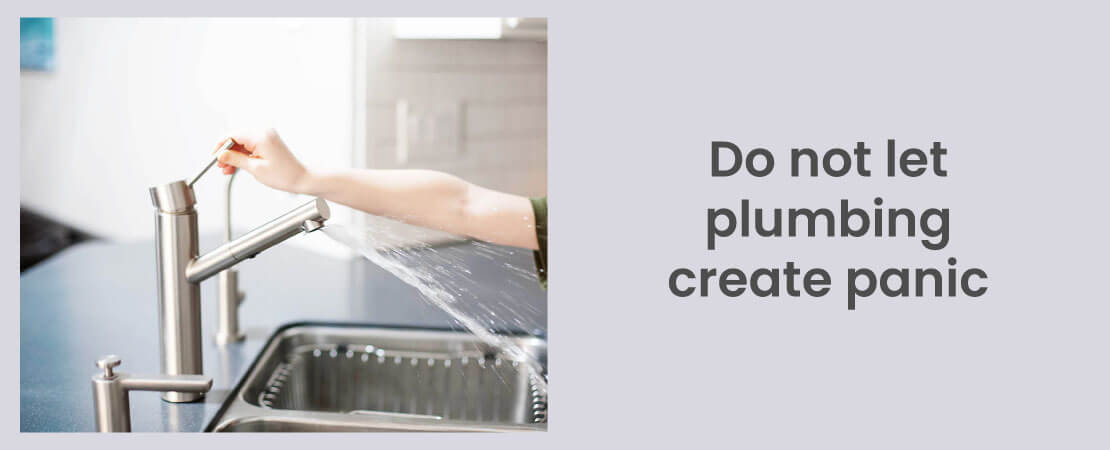
4. Do not let plumbing create panic

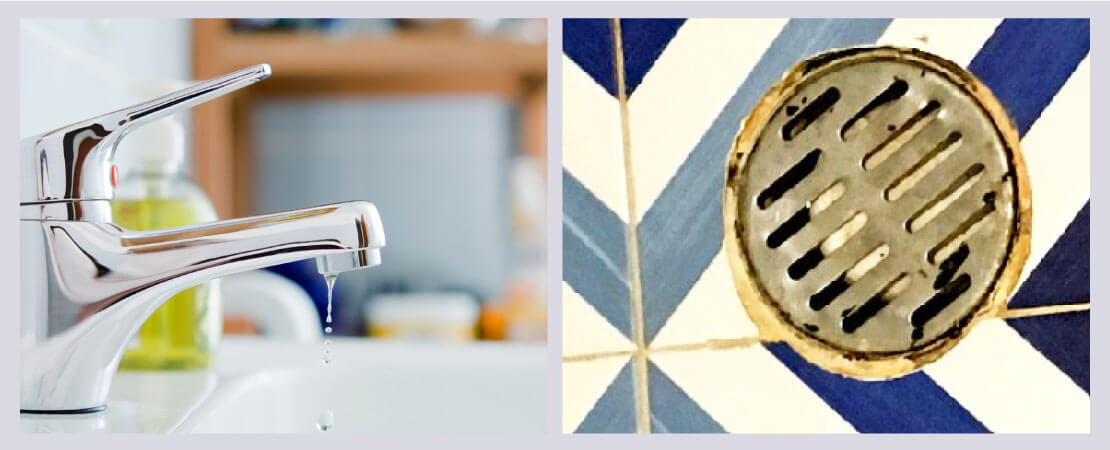
If your finicky fufaji decides to give you a visit this Diwali and a leaky pipe in the bathroom suddenly decides to give way right when he is using the facilities- can you imagine what a nightmare it would be! So before the festive season settles in, completely take care of the plumbing issues in your house. Mend the leaks on pipes, taps etc. Check the cistern once again. At the same time, do a thorough cleaning of the whole bathroom.

5. The dread of drain

You will be fasting during the Navratri days. You will break your fast on a ninth day with delicacies. More sweets and savouries will give off aroma during Diwali and fill the room. But the mood will completely spoil if the stench from the drainage system outside your house invades. Who would want that? So, check all the outlets for any blockages and remove them so that the wastes can be washed away easily.
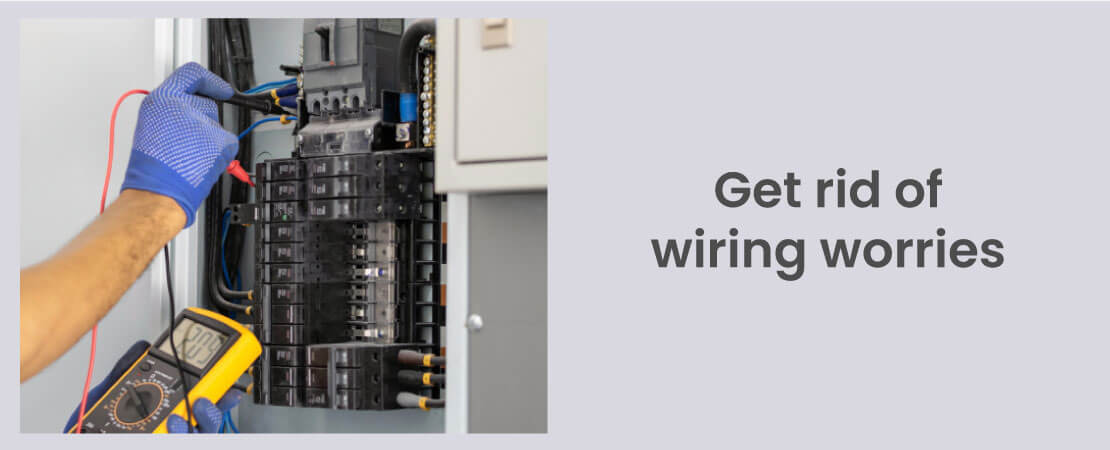
6. Get rid of wiring worries

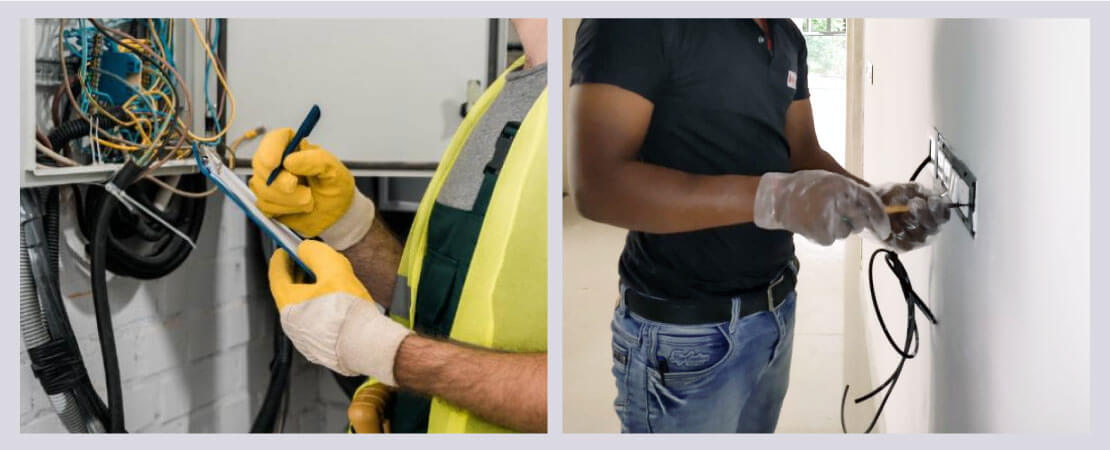
When it is the festivals, you are surely going for “let there be light.” There are going to be electrical diyas this year along with LED lights and other decorative lights. So, make sure the wiring system and the electrical set up is in good condition in your house, the circuit breakers are working fine and eliminate any chance of short circuit2 or other electrical hazards.

7. Closet Cleaning

You do need to make space for the new clothes you are buying, right? Trust us, once you decide to give your closet a cleaning, you will be amazed how many items are there in dire need of being discarded. Pull everything down. It is your best scope to dust the entire inside. Make a pile for the ones you decide to give away. For the rest, fold them and stack them in a neat manner.
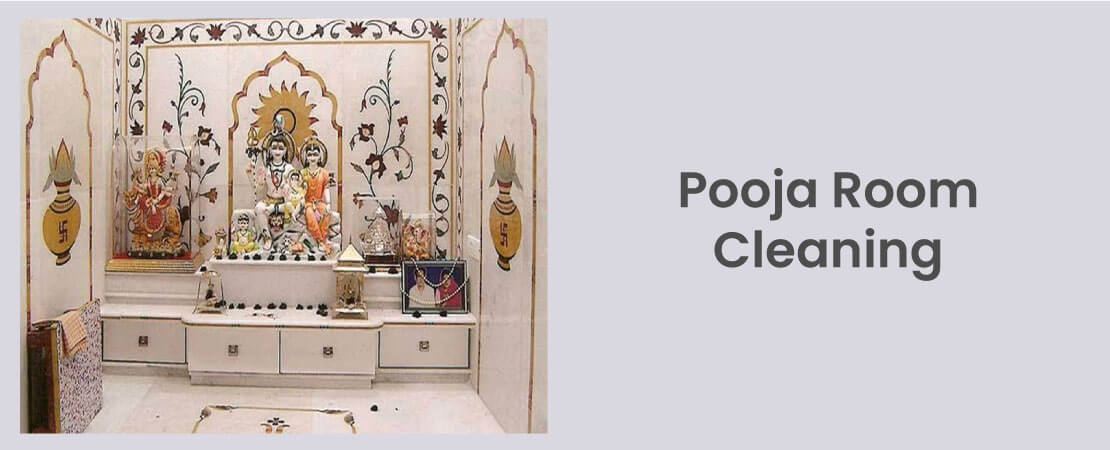
8. Pooja Room Cleaning

It might be a small corner of your home or an entire room. The place of worship needs to be cleaned up too, especially when it is time to welcome the heavenly deities at your doorstep. Clean out the shelves, wipe the various sized containers clean, dust the places where needed, look for cobwebs behind the photographs or the idols, clean the ashes from incense stick holder-in short, deck up your puja room.
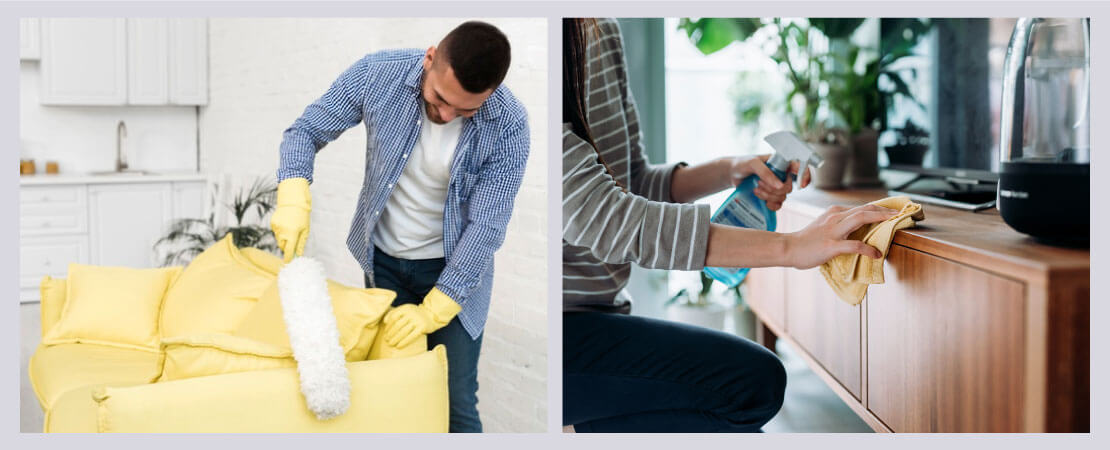
9. Clean the furniture

Regular dusting is not all. See if the wooden pieces need new polish. Change the upholstery, curtains, cushion covers, bed sheets and other furnishings. It is time to push the vacuum cleaner nozzle behind the sofa set. Clean thoroughly, not superficially.
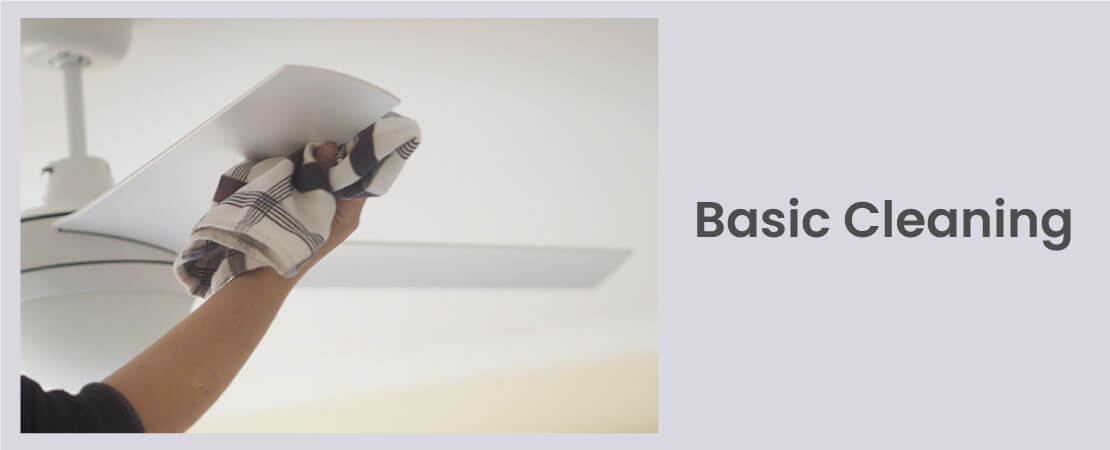
10. Basic Cleaning

Have the doors been making noise? Is there rust on the grills and need a coat? What about the ceiling fan and bookshelf? Well, clean them up. Do away with the unwanted items and organise these parts. Deep clean the mattresses also. Take care of all these and your basic cleaning is done. Do you know what works best? – A room-wise cleaning approach3. Start with the exteriors (if needed and doable) and then move inside – from the living room to each bedroom and so on.

Once done with cleaning, sanitize and disinfect4 every corner your house. Look for the areas that require more attention. Though we may well expect to have a virtual family get together on Diwali this year, our family’s health will always be our priority; so, don’t skip sanitisation and disinfection. Make it a part of your festive home cleaning from now on.

With the pandemic looming large, we need more blessings ushered on us from the gods and the goddesses. It will be apt to welcome them in a clean abode. So, get on with the cleaning spree before the festivities get the better of you.

Have a safe and happy festive season!

Safety Checks Before, During & After Tile Work

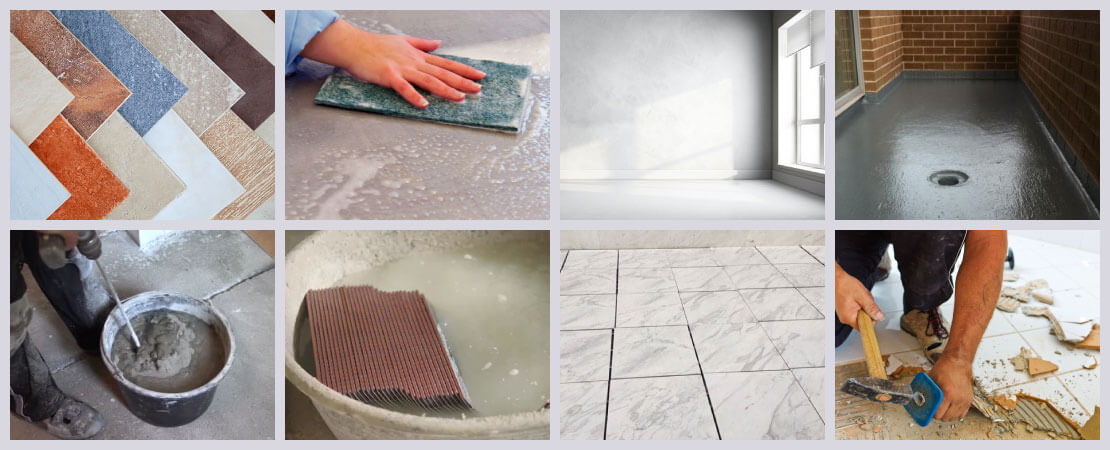
Tiles are one of the most popular flooring options used these days. A tile is a thin object usually square or rectangular in shape. Tile is a manufactured piece of hard-wearing material such as ceramic, vitrified, stone, clay etc., generally used for covering roofs, floors & walls.

In addition to the main purpose of strength and durability, tiles also give home a good look. It is easy to maintain & clean, they come in a wide variety of colours & designs that easily intermix with the décor of your house.

Whether you are doing the installation of tiles for the first time or have done it before, installing tiles in your house is a job that needs to be done properly. Tile installation mistakes are hard to cover up and fixing them usually means to rework on it adding extra cost of replacement or repair apart from potential damage to the property.

So, we thought to tell you about the safety check to be kept in mind before, during and after tile work whether in your Home, Office or Shop or any other property.

A. Checks to consider before you start the tile work

  • The first step is to select the type of tile1 to be used in your home. Also choosing the laying type – paper or spacer joint.
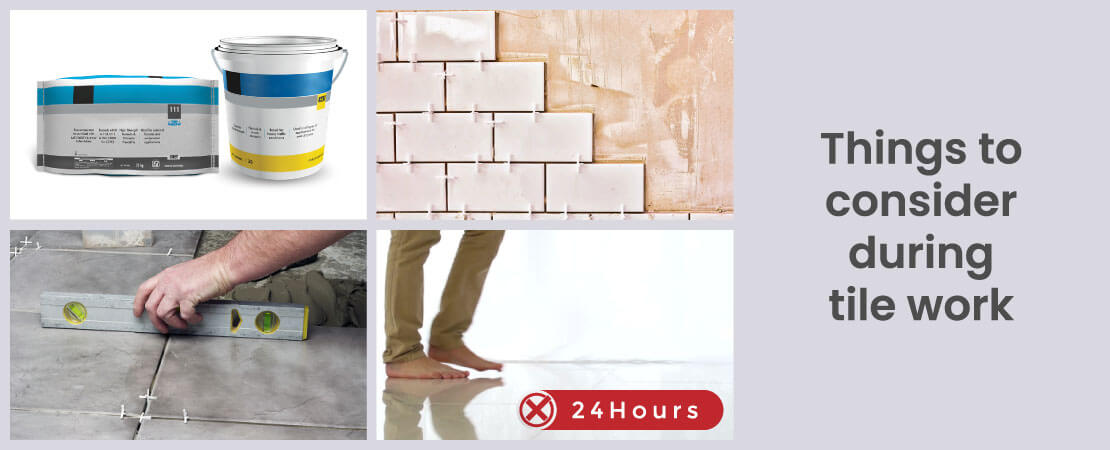
  • Prepare the surface in such a way that it must be levelled, sound, clean, dry and free from grease or any other material. Also make sure for adequate slopes towards the drain outlets/ points in areas like kitchen, bathroom, toilet,terrace, roof, etc.
  • Brick masonry and plasterwork of all the room are complete.
  • It is important to make sure all the waterproofing work for wet areas is complete.
  • Check that the plaster is cut above the slab level for skirting.
  • Prepare mortar mix that can be used within 2hrs.
  • Different door material have different thicknesses. Make sure there is enough door clearance kept between the flooring and door bottom or-else the doors will rub against new flooring.
  • Mark the position of taps, bottle traps etc. in toilet before starting the installation tiles on walls.
  • The tiles should be soaked in water atleast for 2 hours before the tile installation.
  • It is better to do a dry layout of tiles, so that you can plan the position of any cut tiles at less noticeable place depending on the requirement.
  • Additionally, if you are renewing flooring, make sure that the previous flooring material is completely removed with no residue left behind. This process should be done carefully without causing any damage to waterproofing and other associated parts.

B. Things to consider during tile work

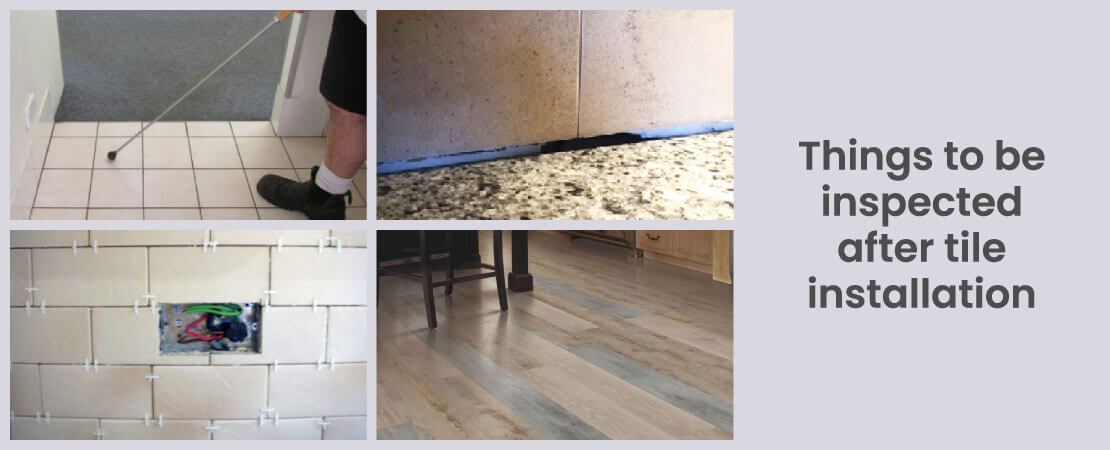
  • If you are using chemicals/ adhesive for tile installation then strictly follow tile manufacturer’s instructions.
  • Use tile spacers in spacer joint to keep tiles at equal distances.
  • Slope should be checked at the time of laying also, so that it can be corrected at that time depending on the requirement.
  • The mortar bedding should be compacted properly to avoid voids.
  • While installing tiles ensure they are well bonded with the substrata to avoid hollowness2.
  • Do not step over the flooring for at least 24 hours after laying.
  • Tiling work must be cured and fill the joints with grout and clean them properly.

C. Things to be inspected after tile installation

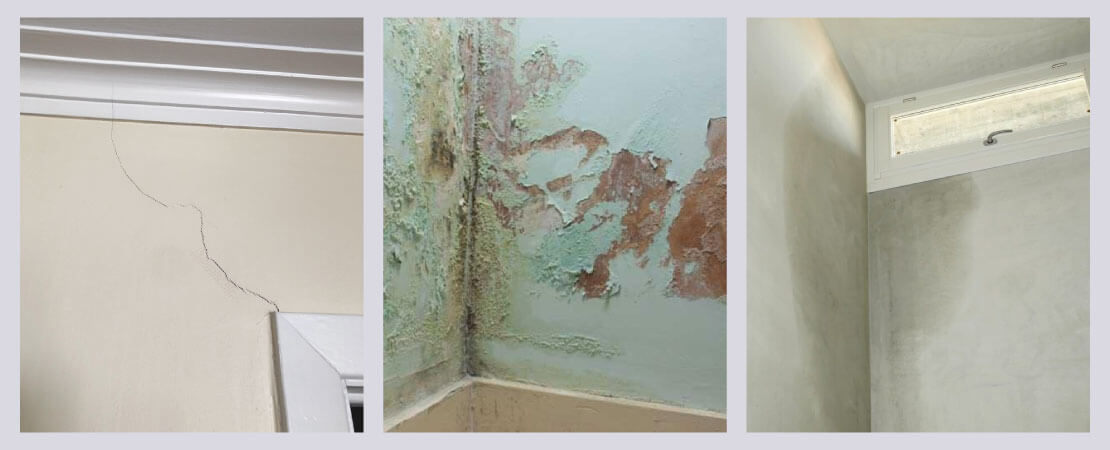
  • Hollowness: One of the important factors to be checked (be it vitrified, ceramic, and others) is hollowness checking to ensure tiles are properly laid. It is mainly an installation problem. But it is very important to check it even after tile installation. The tiles need to be randomly tapped using a tile hollow checker for hollowness. You can understand it more by reading significance for checking and its repair.
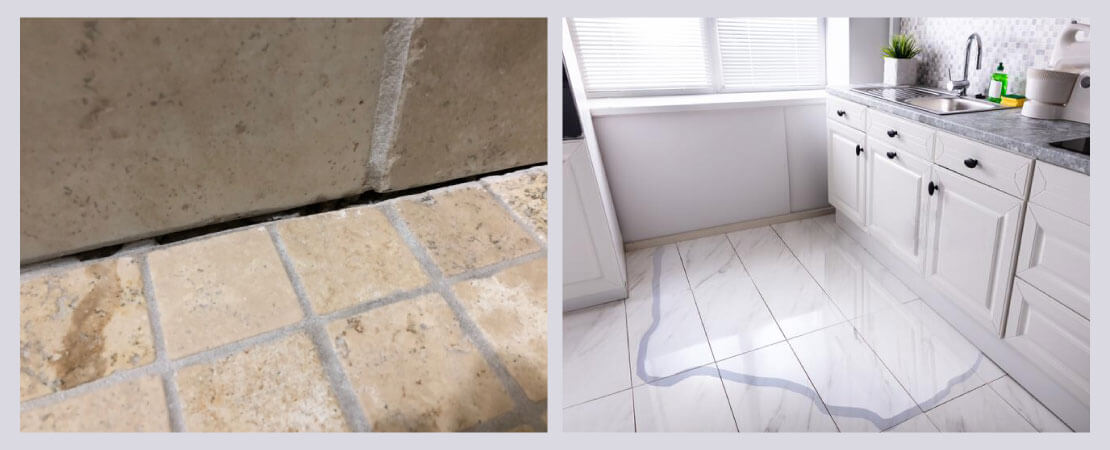
  • Grouting: Tile joints have to be properly filled with suitable grouts/ fillers, without any gaps. Always remember to check that the gaps are filled properly between floor and skirting tile. If gaps are not filled properly, then it will create a path for water to seep-in and create dampness/ seepage in associated areas.
  • Cut tiles: Tiles around the plumbing fixtures & electrical face-plates should be cut in proper shapes and the edges should not be visible after fixing of plumbing & electrical fixtures.
  • Damages, chip offs and shade variations: Damages & chip offs have to be checked along with any shade or colour variations. Damaged tiles (like cracked or broken tile) should be replaced to avoid further problems like moisture intrusion or deterioration and Chip off. Shade variation will create an aesthetic problem.

Apart from the above mentioned points, slopes also to be checked after tile installation. If any water pockets occurs in wet areas, then the slope of that area needs to be surely checked. There are various problems related to incorrect slope in wet areas like damp or seepage related issue, fungus issue, strength of flooring & wall surface will get decreased, etc. But, it is better advised to check and correct the slope before installation to avoid extra cost and time lag due to repair.

Conclusion

We hope knowing things to consider or look before, during and after tiling work will be helpful to you. This information will avoid several tiling defects like cracks in tiles, shade variation in tiles, etc. With these points, you are sure to have a quality tile installation that will last for years to come. And if you want advice from a professional, then you can contact home inspection services who can inspect each element of your property. With the help of this service, you will get information about issues and long term solutions for all types of issues or problems in your home/ property at any stage.

Check your Home’s Health – A Checklist

It is often said that “home is not a place, it is a feeling.” Owning a house is the ultimate dream of most people as it gives a secure feeling to an individual.

Emotion often affects the home buyer and makes it hard to imagine any problems with their new home. Every year lacs of homebuyers in India take possession of their property without knowing actual issues or defects. But they focus more on locations, rates, facilities, size, etc. before purchasing a home or apartment.

If you have bought a new / used re-sale home or apartment, home inspection becomes very important. A Home inspection ensures everything in the house is functioning properly and identifies needed repairs. Inspection is a significant way to become aware of the areas of the house that can act as a hazard or create problems in the future and also suggest solutions for specific issues. The Home inspection is an essential part that ensures a healthy home for your family.

The homeowner gets benefited from a 360 degree home inspection in the long run. The areas in your home or apartment comprise of Bedrooms, Bathrooms, Living and dining, Kitchens, Balcony, etc. The 7 basic elements in all the areas comprise of a wall, ceiling, floor, door, window, plumbing, and electrical. The checklist of a home inspection is vast and detailed. Let us explain you element-wise checklist of home inspection for Indian home/property in brief for better understanding.

1. Walls

Walls are often ignored by homeowners. Wall is a continuous vertical member used to sometimes transmit load from beam to floor. It plays a significant role in a home. Having Wall Inspection done addresses you errors or issues before they become major problem.Essential points which are checked and generally observed on the wall:

  • Cracks on the wall: Fluctuation in moisture and temperature causes constant expansion and shrinkage of concrete.Various types of cracks in building mostly take place during or after construction.The cracks in building may be structural cracks1 or non-structural cracks depending on its nature. Read The causes of cracks in your house.
  • Defects depending on finish:  As there are different finishes at a different stage of construction. Defects can vary depending on the stage of inspection.  Different finishes can be plaster, putty and paint.
    • General defects on plastered surface are crazing, separation crack at joints, efflorescence and hollowness on plastered surface, Flaking & peeling off plaster, loose plaster, undulation etc.
    • General defects at putty finished wall are Surface damages,undulation,uneven, popping, peeling etc.
    • General defects at paint finished wall are uneven finish,undulation,popping, peeling, discolouration etc.
  • Dampness or Moisture on Wall: Flaking, popping, peeling, discolouration etc are visual signs of moisture. To get it rectified, it is important to detect the source of dampness and moisture through advanced technology. If not treated at the right time, this will lead to further deterioration.

Apart from this, waterproofing is checked in wet areas depending on the stage of inspection.

2. Ceiling

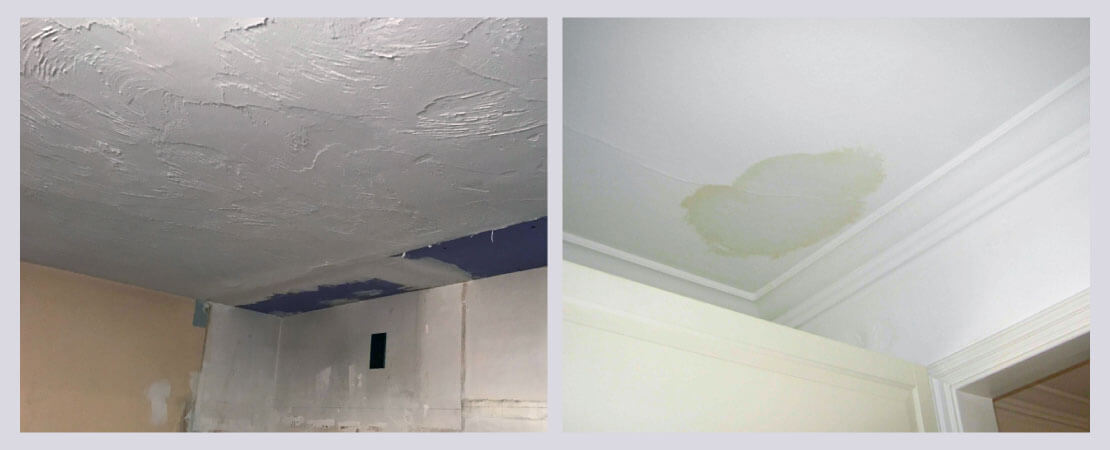
A ceiling is an overhead interior surface of a room or compartment. It can be made of RCC or masonry finish or can be a false ceiling. The Checklist varies depending on the type of material. Unevenness, undulation, crack, and other surface damages are commonly checked in most types. Similar to walls, visual signs of moisture or water stains are checked too in ceiling. Identifying the root cause of stain or other forms of moisture is the important step in dealing with it.

3. Flooring

When you enter your house, flooring is the first element you feel. Flooring adds to beauty of the room. There are various types of flooring materials – tiles, marble, mosaic, Neat cement flooring etc.  Considering very common flooring(tile) , our checklist includes: Checking Hollowness on tile, cracked/broken tile, gap at tile joints, skirting fitted or not, slope at wet areas, etc. These points have their separate significance to check. Like it is necessary to check any hollow tiles present in flooring or dado. If there is any,then it can crack or get damaged on regular use. This can lead to seepage or other moisture-related problems. Similarly, gap at tiles and the incorrect slope will lead to seepage and other deterioration. So, to avoid the major cost and have hassle-free homes & living, it is very essential to check floors properly.

4. Doors

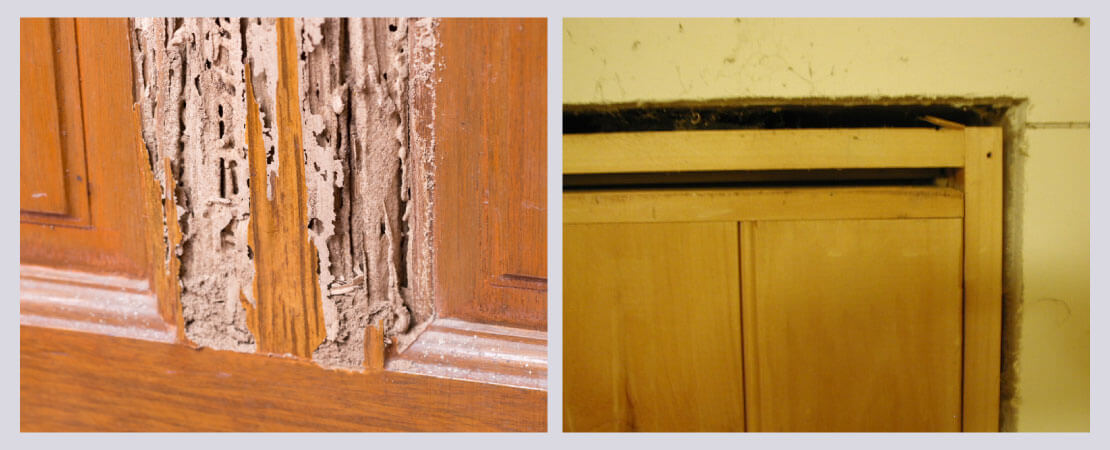
Doors play a significant role in the security of your homes. A door is a gateway and keeping that gateway strong and secure is a key factor in maintaining good home safety & security. Cracks at the frame, the gap between frame and wall, presence of borer or termite, firmness & stability, operation & functioning, alignment, other visual checks etc. are the main pointers in the checklist.  The door is properly inspected for damaged, missing, and uneven fittings.

5. Windows

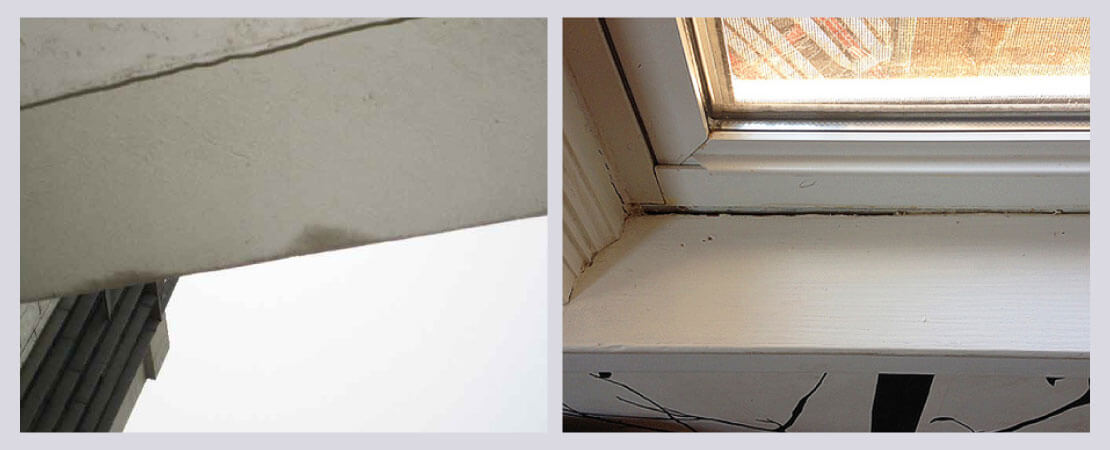
Windows are very important element for efficiency, security and appeal of your home. Apart from this, Windows provide our homes with light, warmth, and ventilation. Windows connect your home to the outer world. It is very essential to inspect your windows before you move in. Main pointers in the checklist: gap around windows frame, window installation, operation & function issue, window sill height, drip mould at chajja, etc. If there is a gap around window frame (may be due to sealant deterioration or sealant not provided), air seeping in and out of these gaps affects the energy efficiency of your home and also allows the moisture to enter inside the house which can cause severe damage to the property in future. Similarly, Chajja without drip mould may seem like a minor thing but it can let rainwater to enter home and can cause seepage problems and create hassles.

6. Electrical and Fixtures

A proper electric system functioning is an important factor for healthy and safe homes. An electrical inspection implies to detailed inspection of the electrical connections, wiring and basic electrical fixtures installed in your home. Electrical Safety is our first priority during inspection. Key parameters (checklist of our inspection) include:

  • A thorough inspection of the electrical wiring system which includes detailed wiring connection & Wire Gauge.
  • Inspection of each and every switch / socket boards – Operation and wiring.
  • Position of installation of the electrical fan, light points, switch & socket boards.
  • Ensuring a home free of electrical shock & electrical accident, and better service life of electrical equipment along with electrical safety
  • Checking the functionality of RCCB2/MCB3, inadequate wire provision, improper earthling, loose connection, etc.

Apart from this need-based DB / MCB charting (Value-added service that comes with every inspection giving you the exact location of the load distribution from each MCB).

7. Plumbing and fixtures

A plumbing inspection is an important part of the entire inspection process. A professional inspection can save home buyers from future inconvenience and expenses. Taking care of your home’s plumbing system is essential to keeping the clean water flowing in and flushing your home’s waste out. Few pointers of the checklist are – Checking leaky faucets & pipes, blockage in the drain, water pressure, plumbing trap condition, the gap around drain outlet, water draining properly through outlet etc.

Nobody wants to enter a home to encounter leakage, seepage, damps, and other problems regarding moisture.  You can also Check out 7 Plumbing Mistakes in Your New Home.

Apart from the above brief checklist of basic elements, identifying unsafe areas of a home is also important. We can also inspect exterior common areas like lobby area, roof etc. and fire safety depending on the requirement.

Conclusion

With the help of this content, our motive was to create awareness about the brief checklist of the home inspection process. Home inspection can show the true picture of your home/property. It minimizes the risk of your investment by showing you all the shortcomings, so that you get it repaired before it converts into a big problem. Hence, get your home/property inspected to have a safe and healthy home.

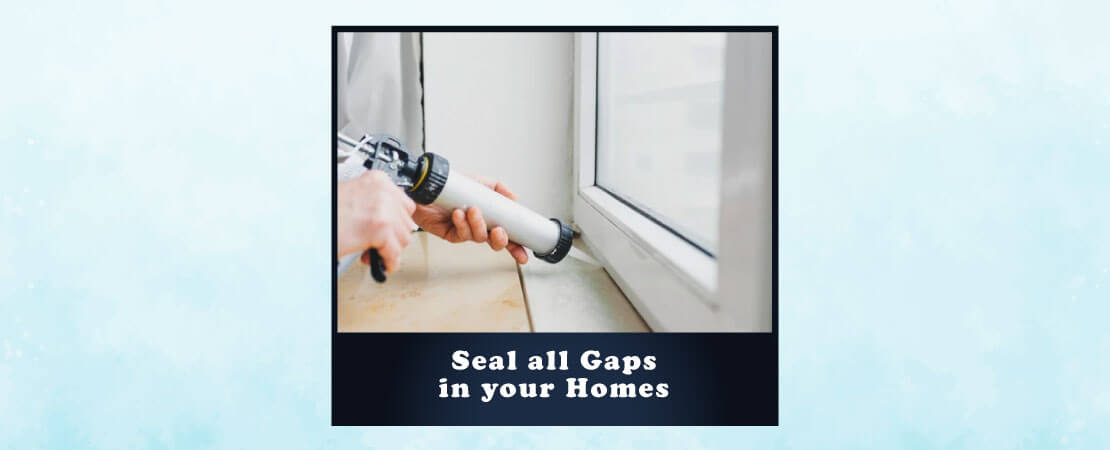
Seal all Gaps in your Homes

Most of us are so busy that we cannot even look after our home/property, so that it remains maintained in a good condition for a long time. During monsoon, we sometimes observe the presence of moisture or patches around the window or even water seepage. This usually happens due to gaps around window frame caused by sealant deterioration1 which is often over looked by a homeowner or resident. Besides, many people may not be knowing about these unfilled gaps, the reason behind it and negative effects. Hence it gets unnoticed and the result is a costlier repair & unwanted hassles.

Let us understand first – What is a Sealant?

A Sealant is a liquid form of material that usually looks, feels, and acts like a gel. Sealant is a substance used to block the passage of fluids through the surface or joints or openings in a material. For better understanding, it is a material that is used to seal the joints between materials such as concrete, aluminum etc. In general, joints are provided in the structures to prevent the damage produced by stresses.

A Sealant can keep its elasticity & stability in both temperatures – high & low. Additionally, it is resistant to other chemicals, moisture and weathering.

Application of Sealant in Home

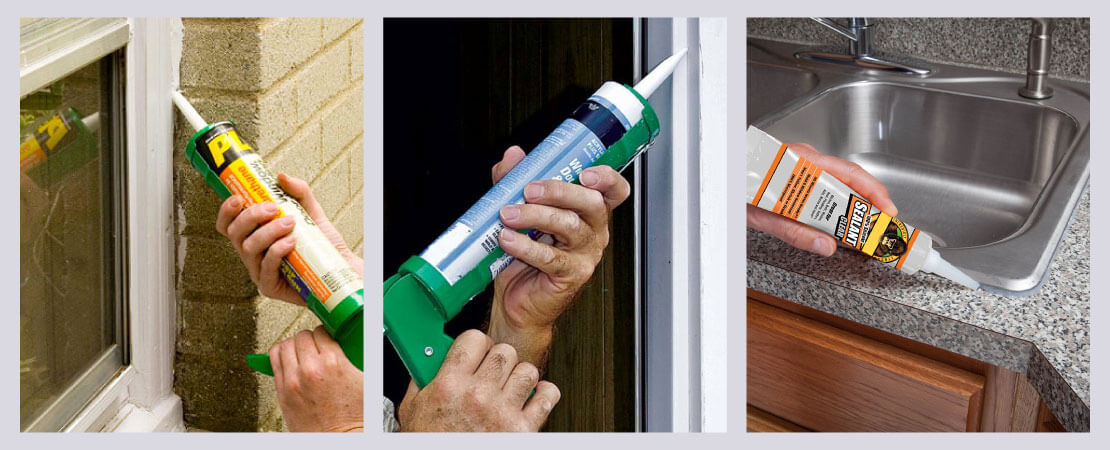
Sealants are used between materials having different thermal movement. In addition, these are also used in the glazing joints and sealing of porous surfaces to non-porous surfaces. The areas where sealants are used in the homes are:

  • Gap between wall and window frame at both sides (i.e. gap around the window frame)
  • Gap around the door frame
  • Gap around sink installation in your kitchen
  • Gap around AC gas pipe2 Sleeve
  • Joint between furniture pedestal and floor

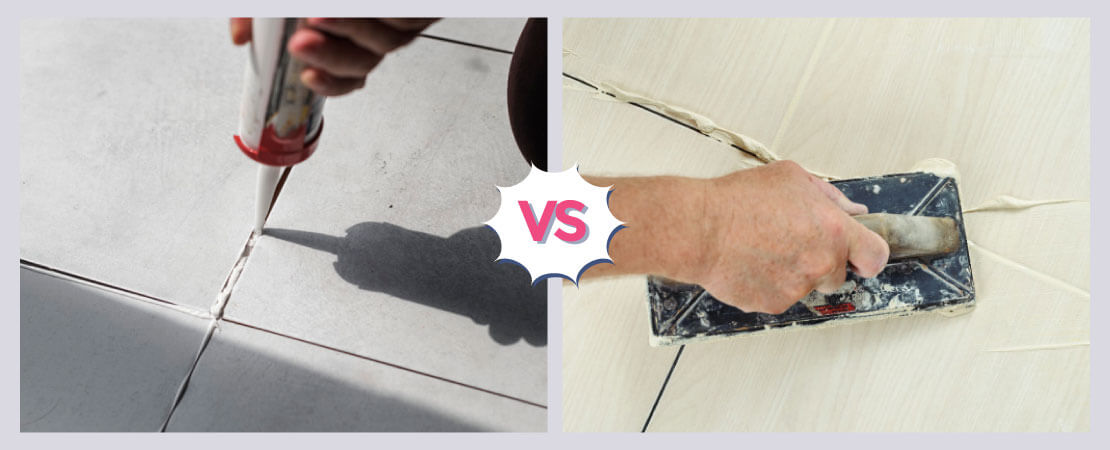
Apart from these, there are other gaps in homes like tile joints in the bathroom, counter stone joints in the kitchen etc. which need to be filled. But as the material is the same, tile or stone grout3 can be used in the joints.

Difference from other fillers (grout)

Let us just understand the difference between sealant and grout:

Sl. No. Sealant Grout
1 A sealant typically refers to a high performance compound having more expensive ingredients, little shrinkage, excellent weathering and UV resistance. A grout is any intermediate performance compound. Typically being lower quality.
2 It is usually flexible material. It is a rigid material.
3 It provides long service life cycles from 10 – 20 years. It has a service life of around 5 years.
4 It is costlier than grout. It is cost-effective.

Beside the above differentiation, there may be different materials (like tile and counter stone joint) having different movements due to thermal changes. In that case use a sealant, as it works well where differential movement can cause your grout to crack. It is very important to choose junction filler wisely to increase its longevity.

Desirable Properties

Sealants used in filling gaps, joints and cracks must be shrink free. Sealants should also have excellent bonding and adhesion properties so that these do not come off when subjected to the sun rain, heat or cold temperature.

After application and on drying, these should form a permanent elastic rubber-like seal to serve their purpose. These should therefore be UV resistant and should offer a long-term durability.

Apart from this, we want to tell you briefly about commonly used sealants among different types4. Silicone sealants are the most commonly used sealants. These are transparent and take 10 to 20 minutes to form the sealing skin over the joint or gap. There are two types of silicone sealant preferred to be used for homes.

  • General purpose silicone sealant – It is a type of sealant which is used in interior areas.
  • Exterior grade silicone sealant – It is the type of sealant which is used in exterior areas. It is more chemical resistant and can withstand different weather conditions.

Benefits of using sealant at Home

Using a good quality sealant can be very beneficial in protecting your home.Proper sealing of windows and doors is something that should not be overlooked. Now let us walk you through benefits of using sealant (related to the common use of sealing around door and window frames) which will be helpful in understanding its importance:

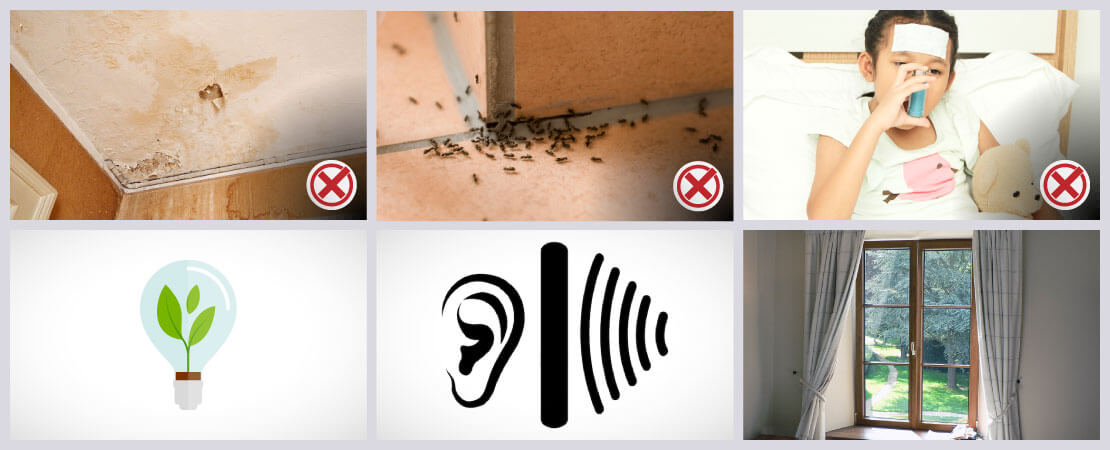
  • Saves from damage to the home/property: Due to unsealed gaps around windows (reason can be sealant deterioration or sealant not being used) and doors, the moisture / water may seep into your home. Most common damages inside homes occur due to water seepage through the gaps between window frame & external wall. This gap will be a source for moisture to flow inside the home. If the gap is not filled properly, it will lead to moisture intrusion, paint deterioration & damage to walls and other associated areas. This point is applicable to other areas of the home as well where sealant is used. Hence using sealant and checking its condition can avoid the entry of moisture in your home.
  • Keeps Insects away:Unsealed windows and doors make it easy for little creatures like mosquitoes, ants, spiders etc. to invade a home.
  • Health Factor: Besides the fact that it will keep insects from moving in, it can also be beneficial to keep pollen and allergens outside. This can be extremely helpful for those who suffer from seasonal allergies. Secondly, as we have already mentioned that moisture intrusion can occur in the home due to unsealed gaps. This will not only damage the property but also cause health hazards due to moisture.
  • Improves Energy Efficiency: If your doors and windows are properly sealed, then the temperature of the room can be maintained or regulated during both seasons (summer & winter). Improper sealing ultimately makes it more difficult for a cooling system like Air conditioner (AC) to regulate temperature. When AC is constantly working harder to regulate the required temperature within the home, chances are that energy costs will increase. Not only it will be more expensive, but it will also put more stress on the system/appliance than necessary.
  • Obstructs outside noise: Sealing windows and doors properly can also prevent street noise from entering your home and residents can continue to enjoy the peace and serenity inside their home.
  • Well maintained Window: A buildup of moisture being untreated for a period of time can cause your window (or door) to begin to warp and lose shape. Checking the condition of sealant is one of the tip for window maintenance.

Conclusion

Sealant plays a significant role in your home. When unwanted gaps are properly sealed, deterioration can be over and you can enjoy your life’s big investment for a long time. Our objective of writing this content was to tell you about the usage and importance of sealants for your home. Also, we wanted to create awareness that sometimes a small defect in your opinion like a gap around the window frame or sink, if left unnoticed can create a much bigger problem in the future.

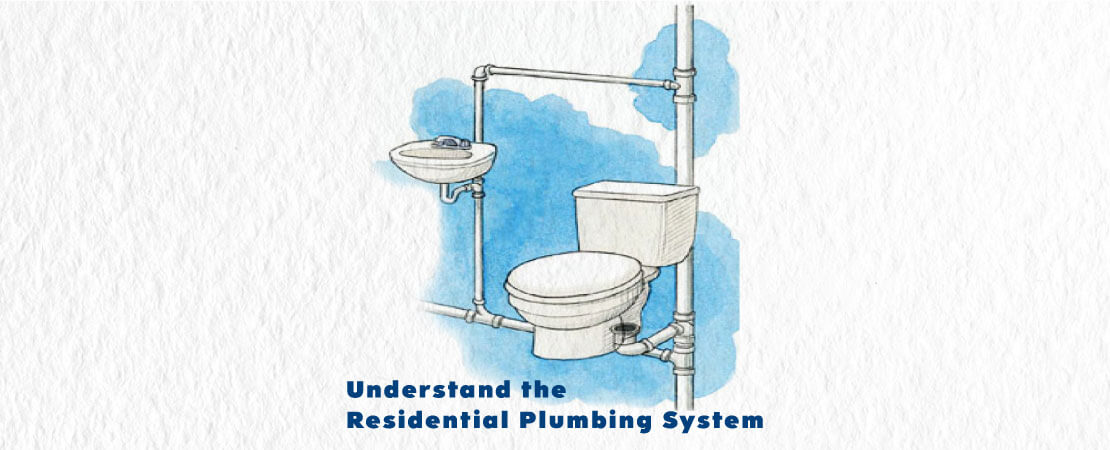
Understand the Residential Plumbing System

Your home’s plumbing system is important to keep your standard of living comfortable. If it is not working properly, you would not be able to take a shower, wash your hands, use the toilet, wash utensils, or run the washing machine. Plumbing systems are responsible for quite a bit. However, most people do not know what their plumbing system is. They just turn the handle or press a button and expect the water to come out at the pressure they want.

As a homeowner, it is important to have a basic understanding of how your plumbing system works so that you can take better care of it and prevent a costly breakdown. Because plumbing is complicated and one of the costliest systems to repair or install in a home, it is important to understand how the system works.

The residential plumbing system is a complex network comprising of hot & cold water supply pipes, fixtures, drain pipes, traps, valves,vent pipes, water storage tanks, etc.

A plumbing system serves two purposes: to supply water for human use, and to get rid of human wastes. It consists of a store of water that is distributed to various outlets.

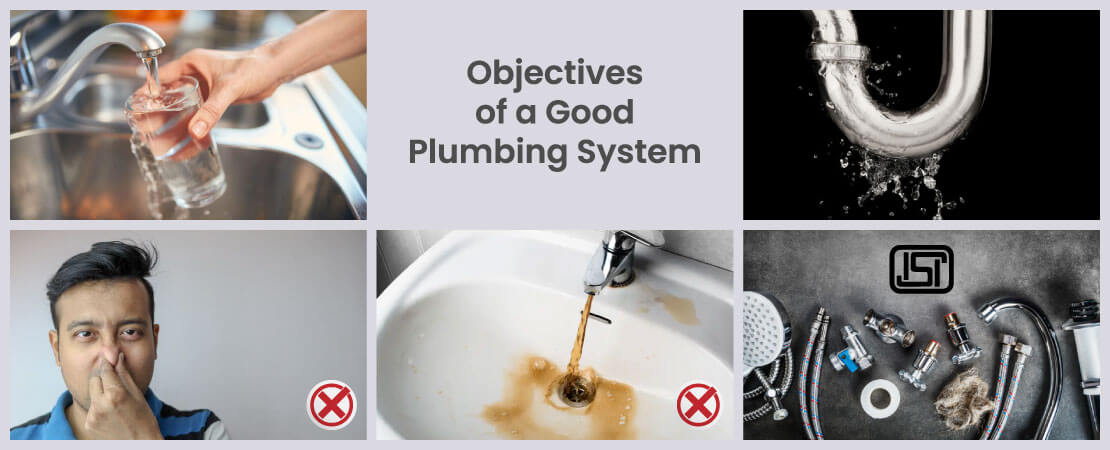
1. Objectives of a Good Plumbing System

A good residential plumbing system makes a home a more comfortable and liveable place for the family. Ideally, it should:

  • Consistently supply safe drinking water
  • Efficiently collect and dispose of wastewater
  • Have no leaks that can waste water and create further problems
  • Prevent foul odours from escaping the system
  • Prevent clean water and wastewater from mixing together
  • Be connected to fixtures that meet quality standards

2. Essential Parts of Residential Plumbing System

  • Water Supply System (flow of water into a house)
  • Fixtures and Appliances (where water is used for carrying out various activities)
  • Drainage System (collection and disposal of used (waste) water)

a. Water Supply System

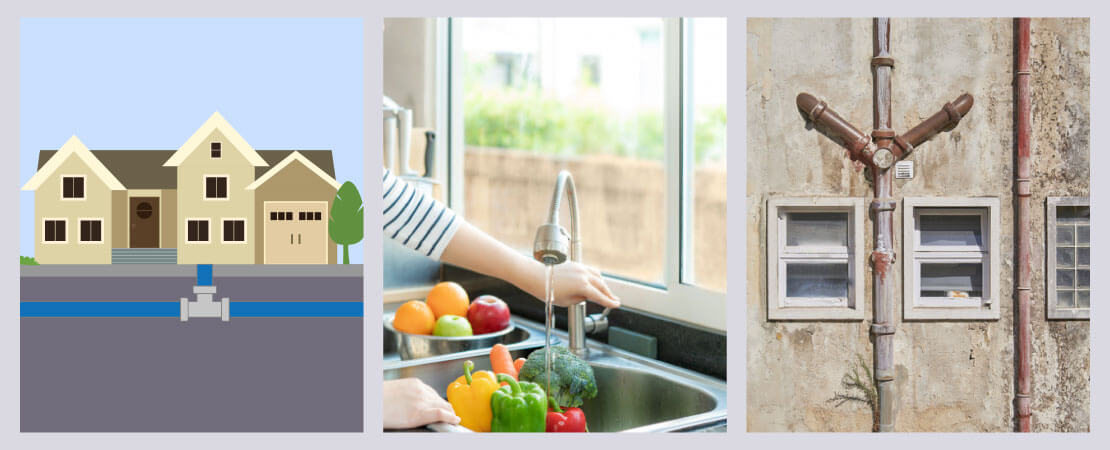
  • We are all aware that Potable water is supplied by the municipality or through private underground bore well.
  • This water enters a house through the main supply line. Water supply in a house is either of direct water supply system or an indirect water supply system.Let us understand it briefly:
    • Indirect water supply system: Water from mains is conveyed to storagewater tanks. The underground storage tank is connected to an overhead tank via a pump and a supply line; the water flows from there to any tap or outlet by gravity. This system is mainly used when water pressure in mains is not sufficient enough to deliver water at all faucets with adequate pressure. In India, usually we follow this system.
    • Direct water supply system: All water outlets of a house receive water directly from the underground tank with the use of a pump that supplies the water directly from the underground tank to all outlets. Such a pump should be able to continuously supply the line with pressure, so that whenever one opens a tap, water flows out.

To understand in detail about both direct and indirect water supply system, click here1.

b. Fixtures and Appliances

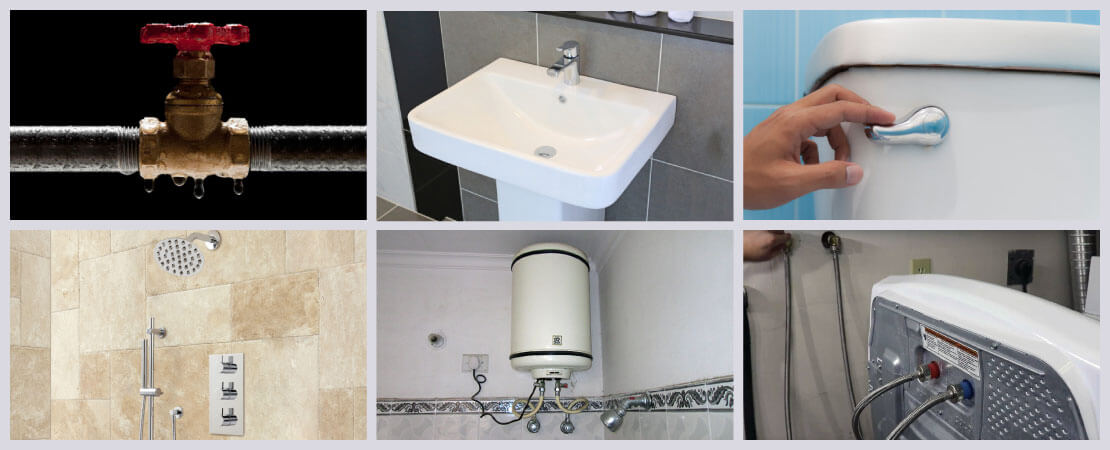
Fixtures, which are typically equipped with faucets, are needed so that the water supply can be used properly. Examples of these are showers, bathtubs, toilets, and sinks. Electric appliances such as dishwashers, washing machines, and geysers use water and must be connected to the waterline. The water in the pipes need to exert a bit of pressure so that it can be used in fixtures and appliances.

c. Drainage or Waste Water Disposal:

The wastewater system collects and disposes of wastewater through the use of gravity. The used water goes down drain traps that prevent foul gases from being released inside the home. The wastewater exits the home through the wastewater mainline, then it is collected in the septic tank or the municipal sewer line.

3. Areas and basic components of plumbing in the Building

a. Bathroom: Basic plumbing components in a bathroom are:

  • Main valve – to control the water flow
  • Basin – only cold or cold + hot inlet point & one outlet point
  • Water Closet – Health faucet point, cistern flush inlet point, outlet soil pipe
  • Shower – one head shower, one faucet, shower diverter, one floor outlet pipe
  • Geyser – inlet cold line & outlet line
  • Additional points like bathtub, washing machine, etc

b. Kitchen: Basic plumbing components in a kitchen:

  • Main valve – to control the water flow
  • Sink – only cold or cold + hot inlet point & one outlet point
  • Additional points like dishwasher, washing area tap point, etc

c. Roof/ Open terrace/ Balcony:

Basic plumbing components in a balcony/open terrace:

  • One or more rainwater outlet pipe

Basic plumbing components in a Roof:

  • One or more rainwater outlet pipe
  • Water tank & pipelines

4. Types of Plumbing Pipe lines in a Building

There are mainly 3 types of water running in a building:

a. Supply Water

  • Generally, single source of water (eg bore well water) is used for every use. i.e. drinking, cleaning, bathing and toilet flushing.
  • In a large complex with STP plant, water from plant is used for toilet flush only.
  • In some areas, water from the government body is used for drinking purposes Only. Bore well water can be used for other purposes.

b. Waste Water: Two different pipes are used for waste water:

  • Floor outlet pipe i.e. bathroom & kitchen waste water from bath & cleaning
  • Soil pipe – used for WC outlet pipe

c. Rainwater: Rainwater pipe is used for roof & open terrace rainwater outlet.

Apart from this, a vent pipe (usually connected to the soil and drain pipe) is provided for the purpose of the ventilation of the system. A vent pipe is open at top and bottom, to facilitate the exit of foul gases.

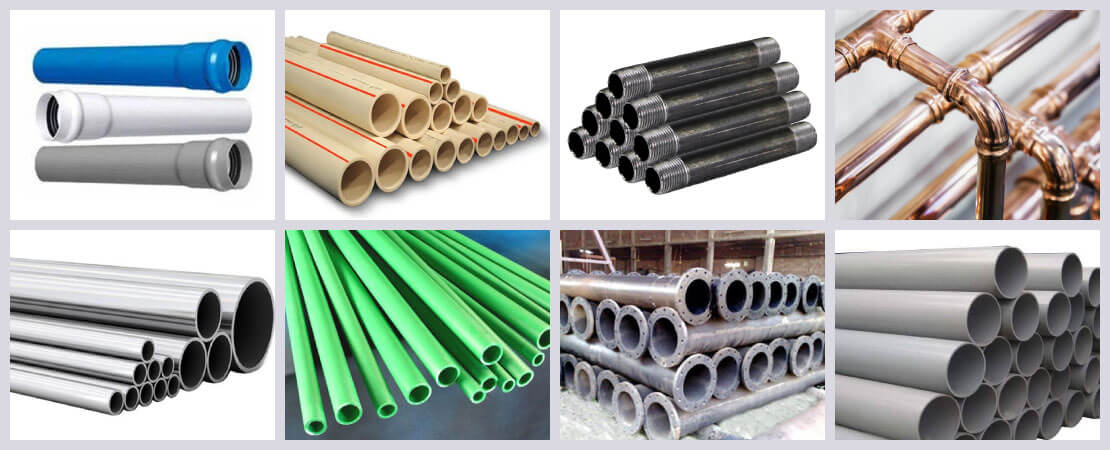
5. Types of Plumbing Pipes

a. Fresh water pipes

  • Unplasticized polyvinyl chloride(UPVC)
  • Chlorinated polyvinyl chloride(CPVC)
  • GI pipe (Galvanized iron pipe)
  • Copper pipe
  • Stainless steel Pipes
  • PEX or Cross-linked Polyethylene Piping
  • PPR pipe

b. Waste/soil/rainwater pipes

  • Cast iron Pipes
  • PVC pipes

There are various other types of plumbing pipes for residential buildings or others. Each pipe has its different characteristics and application.

Conclusion

This is your home’s plumbing system in a nutshell. It is much more complex than this, but with these basics in mind, you will hopefully have a better understanding of how your plumbing works and where a potential problem could be. If you would like more information about plumbing, have any questions regarding your plumbing system, want to have plumbing maintenance or you are experiencing a problem and need professional help, then click here.

Ensuring Safe Home inspections

The Coronavirus pandemicis still going on. Millions of people globally have been caught in the grip of this virus and many have lost their lives. Now everyone is scared about themselves and their family’s safety. No one wants outsiders to enter in their homes.

Pandemics, call for preparedness and not panic.

Considering the safety of our clients and team, we follow certain protocols which will remove doubt regarding well being & hygiene of your family. Considering the worry of our customers to get their home inspected in this pandemic, here is how we work keeping in mind the safety & hygiene for our customers as our priority:

1. Safe travel to the site

We give importance to commuting to the inspection site. In this pandemic, we strictly restrict the use of mass public transport by our team.They use bike or company driven car.

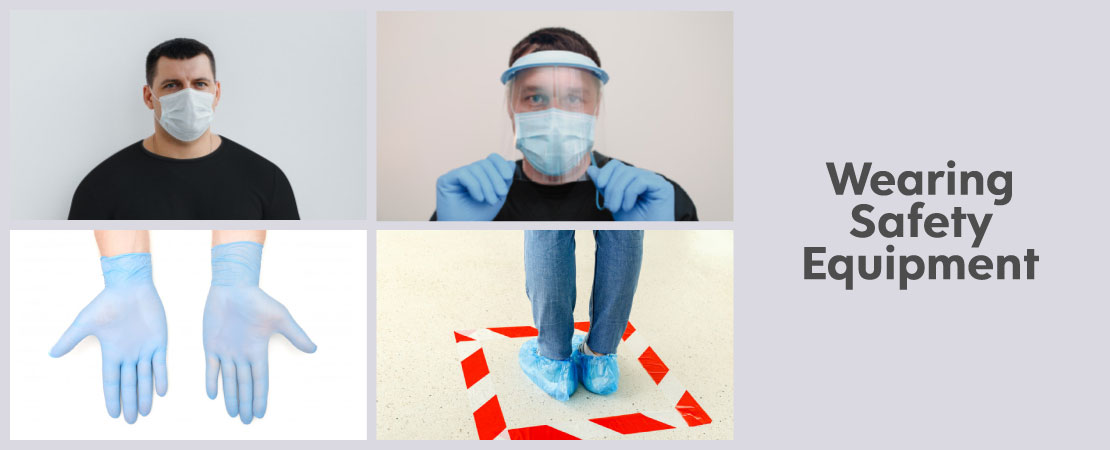
2. Wearing Safety equipment

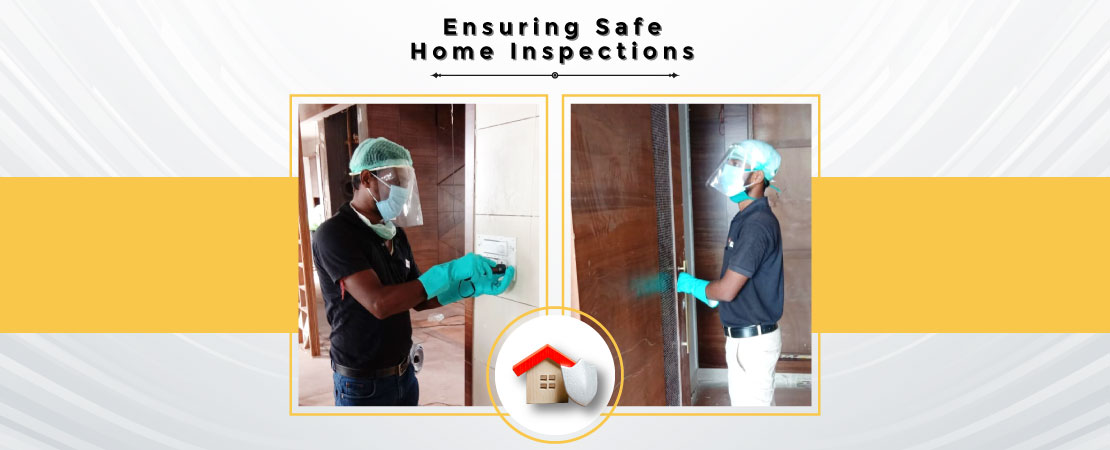
Our inspection team wears need based safety equipment – Face mask, face shield, hand gloves, shoe covers, etc. We wear disposable, fresh & sanitized set of safety equipment at the site before beginning the inspection.

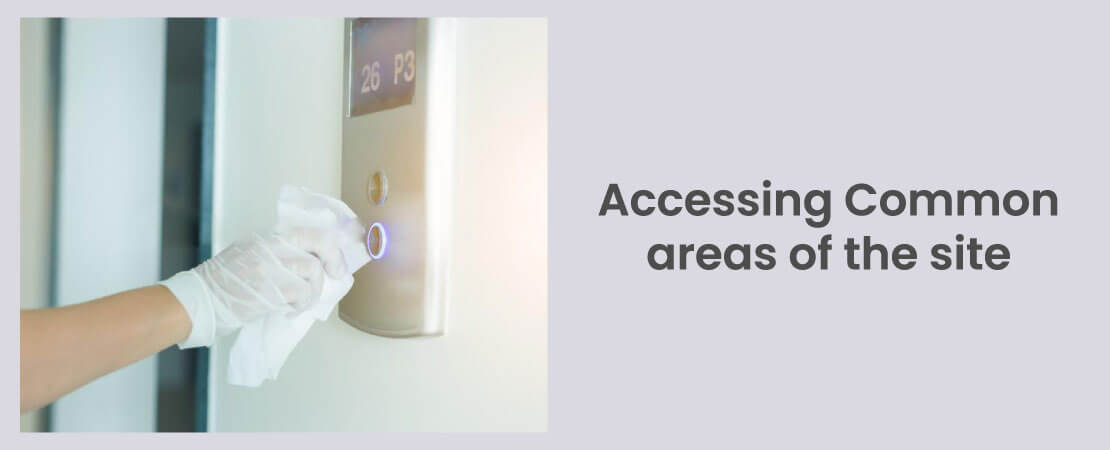
3. Accessing Common areas of the site

Our team follows safety measures while accessing common areas of a building (lift, staircase etc) by avoiding support of a handrail during usage of stairs. And safely operating lift by one person of the team that too with help of tissue paper which is disposed after usage.

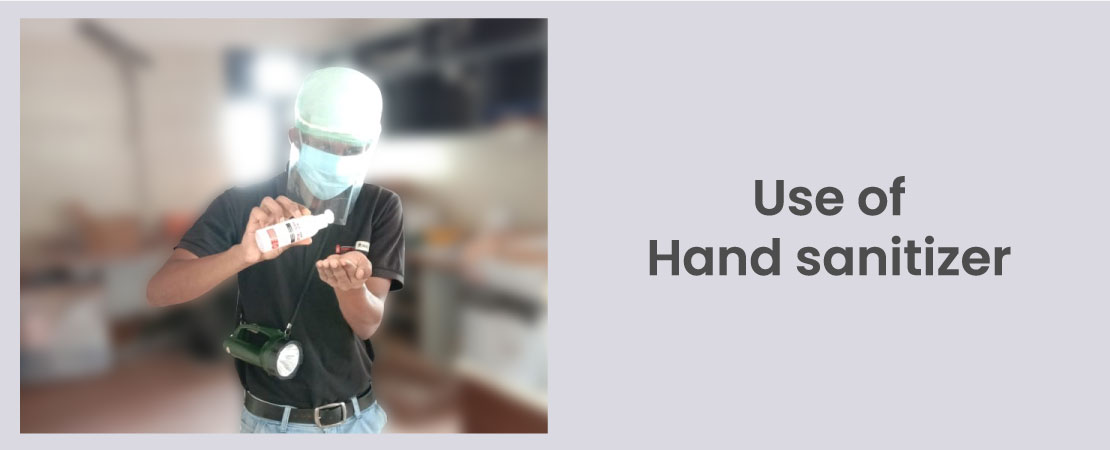
4. Use of Hand sanitizer

Hand sanitizers are generously used by our team during the home inspection process, also before wearing and removing safety equipment. They will always follow hand hygiene to avoid the spread of virus and germs.

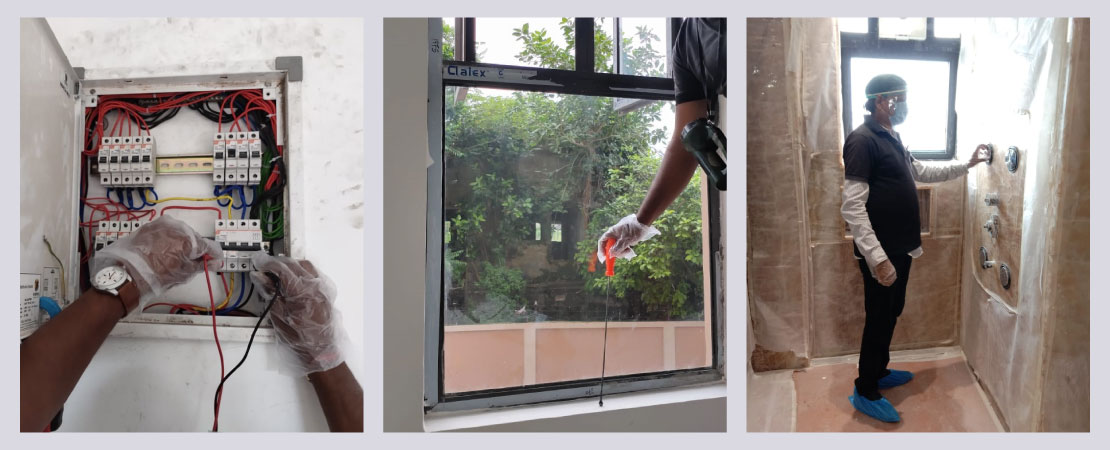
5. Using inspection tools safely

All home inspection tools used only with gloves donned. Besides, they are being cleaned regularly.

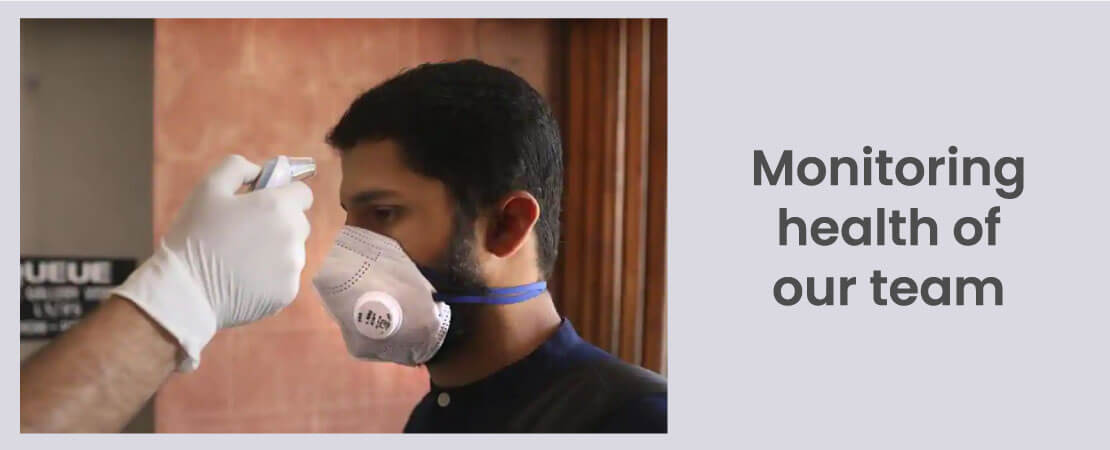
6. Monitoring health of our team

None of our inspectors or other team will work when they have a fever, cough or shortness of breath. We ensure monitoring of their temperature and health for the safety and well being of our customers and team.

7. Following Social Distance Norm

Our team follows social distancing norms – interacting with a customer at a safe distance. If the home’s occupants are in the home, the occupants are advised to stay in a centralized / separate location during the inspection and not follow the inspector around. Under no circumstance should the occupants be within 6 feet of the inspector. We encourage work from home and direct to site culture for increased safety.

8. Safer report exchange and payment option

Being a company that uses technology, the inspection report is exchanged digitally (via email) and our payment process is online mode also depending on the requirement of our customer. This option is for the customers who are sceptical about the point of contact during current time as physical reports or currency notes can spread infection.

Apart from the above, all inspectors are available by phone or video call after the inspection for follow up discussions / queries on our inspection report. Our team maintains cleanliness and hygiene during the entire inspection process. By working together, we can continue providing outstanding home inspections while better protecting our clients, team, home’s occupants and others.

MACJ – A Buyer’s Choice Home Inspections, a pioneering Professional Home Inspection Services in India is trying to set high standards for the Indian home / property inspection industry – on how to respond to the current situation. We would also like to tell you that the mentioned safety protocols are being followed for all types of our inspection services at this current time. The health and safety of our customers and team are our first priority. Besides, we always try to ensure proper health and safety of your family and home/property by detecting issues and providing solution for specific issues. A Home inspection is significant and essential to ensure a healthy & safe home.

Know the Hygiene Hotspots in your Home

We may do a good job of keeping our Homes cleaned and sanitized, yet there are spots that often get overlooked and neglected. There are many corners in your house that need more than just simple cleaning. Make sure you reach all those hygiene hotspots around your home and sanitize them thoroughly. You may not know but germs must be lurking around to make life miserable for you and your family. Do not take chances because hygiene is crucial. Read on to know which are the hygiene hotspots in your home and how best you can sanitize those spots.

What is washing and sanitizing?

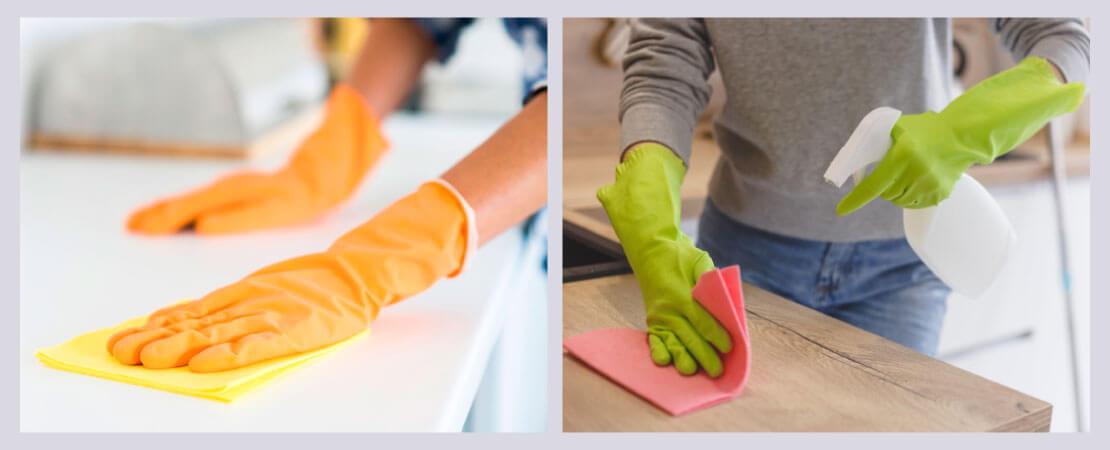
Washing is a mere cleaning of the surface. While you wash your countertop in the kitchen or the floor in the bathroom, you just get rid of food particles, soil, dust, and other such unwanted elements. Some amounts of bacteria also get washed away in the process but not all. You can wash a surface using simple soapy water, vinegar mixed in water, or any of the branded cleaning products available in the market. But sanitization is not just a removal of dirt, grease, and food debris from a surface. There are bacteria and other pathogens on the surface. You cannot see them with the naked eye. Sanitizing kills those germs and makes the surface completely contamination-free. For hygiene hotspots in a home, washing alone is not enough; following up with proper sanitization at regular intervals is also important.

Which are the hygiene hotspots at your home?

To keep home healthy for the family, it is important to maintain good hygiene. This means is to do all you can to prevent your home environment from becoming a breeding ground for disease-causing germs.So, have a look at the following spots in your home.

1. Kitchen countertop and sink

Food, dust, bacteria, and liquid spills- you name it and you have it on your kitchen countertop. Raw meat, fish, green vegetables everything is on it. You wash all of them in your sink too. The food particles are left to sit in there and give rise to health risks. Thus, a range of microbes can be present here. The same stands true for the cutting board too. A mix of fruits &vegetables, meat, fish in raw form increases the chances of contamination.

2. Washcloth and sponges

They do not occupy a large part of your mind when you set to sanitize your home. But trust us, a lot of dirt is left behind in them even after cleaning. These remain damp and wet. Now, bacteria grows well in a moist environment. Your washcloth and sponges are a warm abode of them. Using the same sponge for months? You are only spreading the bacteria all over the home.

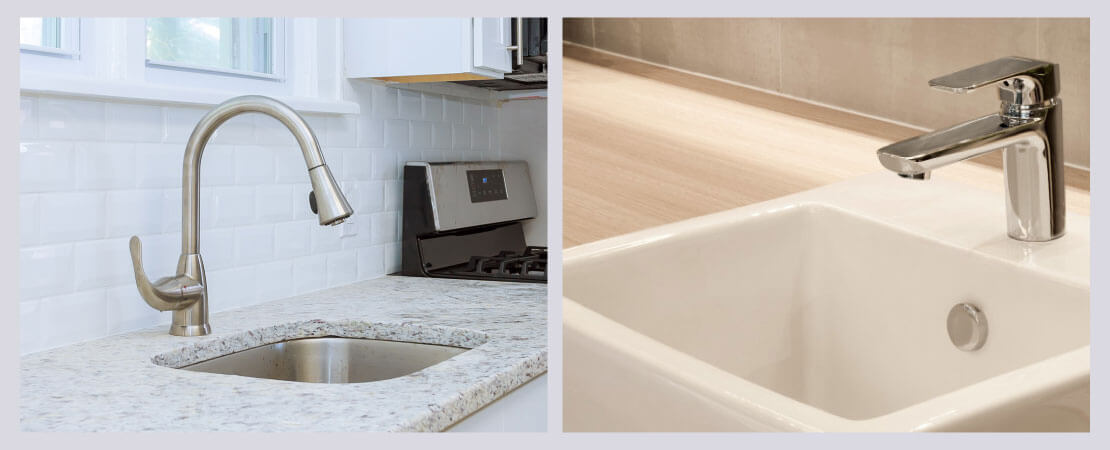
3. Kitchen and bathroom faucets

The taps and other faucets in both the kitchen and the bathroom get dirty and contaminated easily. Very often you touch these objects with dirty hands. When someone else puts their hands on them they automatically get infected.

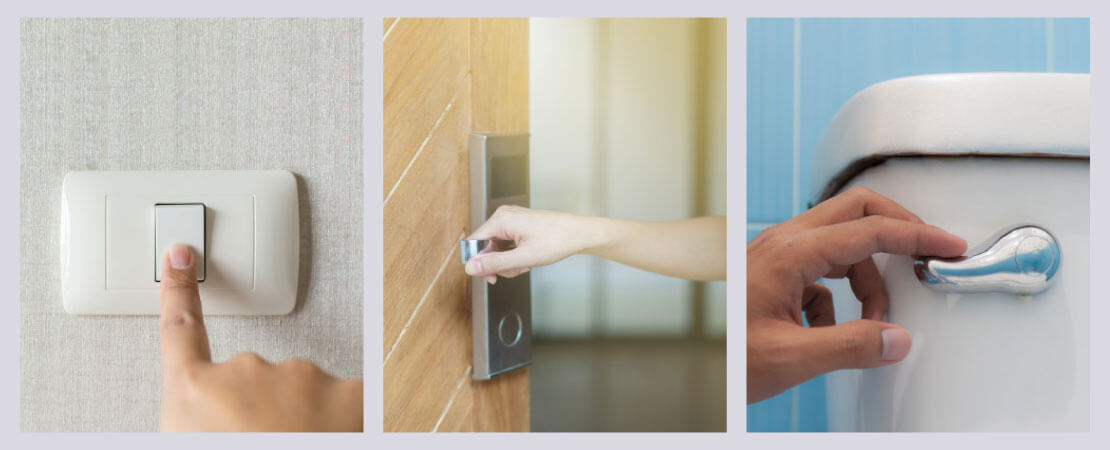
4. Knobs, handles, and switches

Handles of doors and kitchen cabinets, doorknobs, switches, and toilet flush buttons are smaller surfaces. But they pack a lot of punch in terms of germs. Many users are handling them daily. Contamination risks are high too.

5. TV remote, Telephone handset, Kids’ toys

Being handled by multiple users, even during snacking, the TV remote is home to multiple pathogenic bacteria causing pneumonia, diarrhoea, skin infections, etc.

Telephone handset & mobile phones are also one of the germspot. As mobile phone is a device that is with you almost all the time, and everywhere carries many germs on its surface at any given point of time.

Kids’ toys, when playing outside, become dirty. Kids may sneeze on the toys and put it in the mouth the next moment. Contamination all over!

6. Floor carpet

A Carpet usually carry a lot of dust which is not so good especially for people with dust allergies. These can collect dust, germs and indoor allergens such as house dust mite debris, pet hair etc.

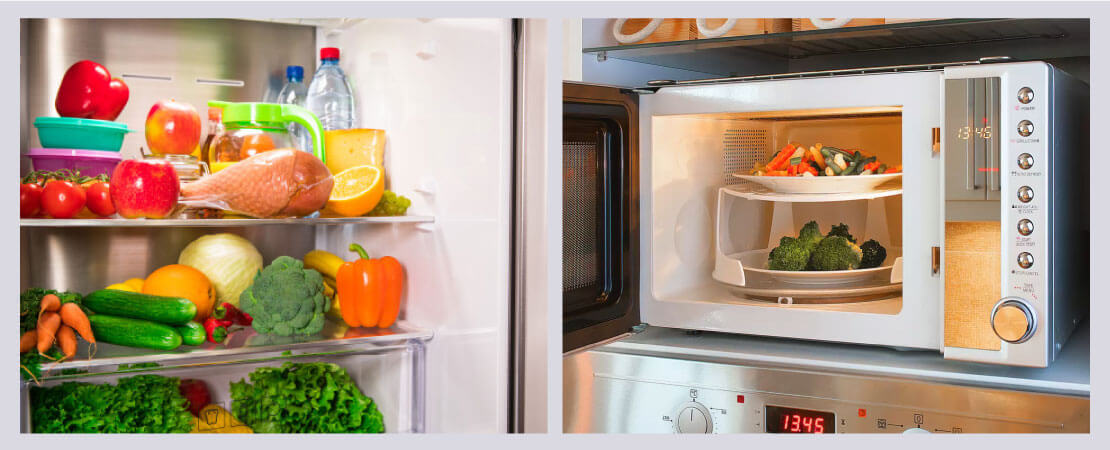
7. Inside the refrigerator and micro oven

Proper cleaning of the refrigerator is vitally important, though is often overlooked and viewed as “too hard”. Did you know that dirty fridges can act as a breeding ground for harmful bacteria such as salmonella, listeria and E. coli?

Microwave ovens also attract germs on a regular basis. Foods are taken in and out of these appliances randomly. This makes them breeding ground for bacteria and other germs.

8. Kitchen Cabinets

It is not only the cabinet handles that you should worry about. The doors of the cabinet and the insides are equally important hygiene hotspots. Can you guarantee that you always wipe your washed utensils dry before keeping them inside the cabinets? You can’t. And the locked moisture inside gives rise to bacteria and other pathogens. Very often you might touch the cabinets and the insides even after handling raw food items direct from the market. That way, you give an entry pass to the germs.

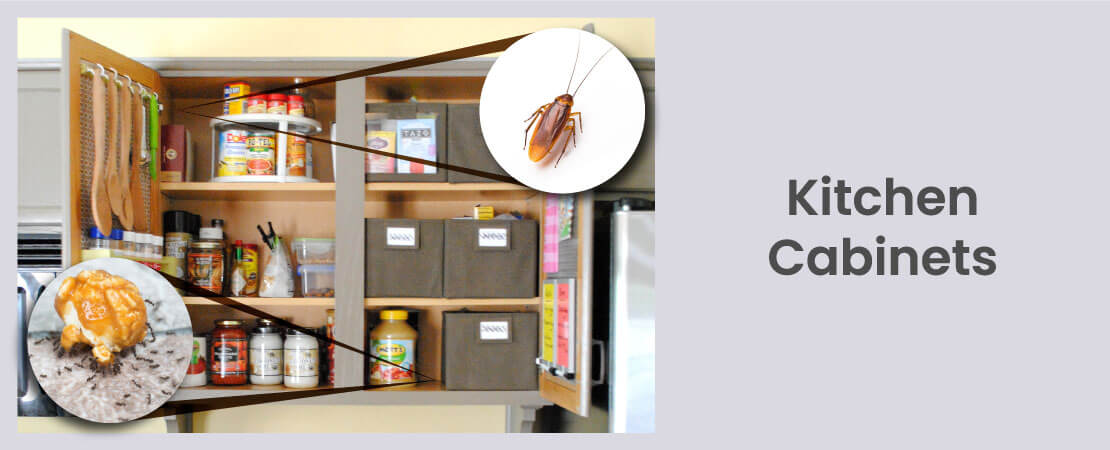
Kitchen cabinets are also favourite hiding places of pests, especially roaches and ants. To eliminate them, you must get a pest control service1 done regularly.

9. Toilet Seat, Cover& others

Yes, the seats and covers carry innumerable germs for obvious reasons! Touched by multiple users, incidents of backsplash, etc invite germs in and make these surfaces hygiene hotspots. Flush handle2 is also a germ spot which is a common touch point in your home.

10. Trash bin

During the whole day, you touch the trash bin umpteen number of times and do not always wash your hand before moving on to other chores. Hygiene hotspot indeed!

Apart from this, damp corners of your home3 can also be a hygiene hotspot.

How to sanitize these hygiene hotspots?

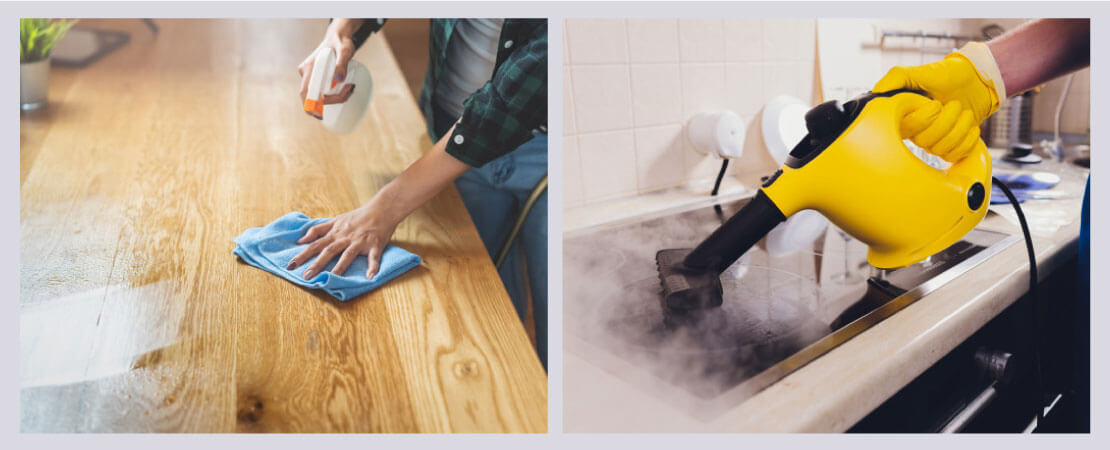
Firstly, wash surfaces with soap and warm, clean water to remove dirt and debris. Next, sanitize surfaces with household bleach. To know more, click here4.

It is preferable that you should use different cutting boards for different items. Do not use the same cutting board for vegetables and non-veg items. Every time after use make sure you wash it with soap or detergent and water to get rid of the germs left behind.

Soak washcloth and sponges in lemon juice or white vinegar. Dry wet sponge thoroughly in the sun. Do not use the same cloth or sponge for more than a month.

Wash your hands well with soap after coming back home and then only handle the switches, doorknobs, kitchen utensils, TV remote, etc. For sanitizing these smaller surfaces you can always use all-purpose cleaner and wipe them with a microfiber cloth. Repeat this at least twice a week.

In this current situation, you can also opt for steam cleaning service5 which is safe and eco-friendly method of sanitization.

Additionally, close the toilet cover while flushing to prevent backsplash. Make sure you clean cover and the seat altogether before leaving the washroom.

After emptying your trash bin, wash the inside of it using soapy water and a brush.

If you choose to use any sanitizer or disinfectant, read safety rules6 & basics.

Lastly,don’t forget to wash and sanitize your hands.

To reduce the chances of contamination, you must wash and sanitize your hands7 frequently even while staying at home.

So this, in a nutshell, is how you take care of the hygiene hotspots scattered across your home. Sanitizing home8 is a difficult task. But it can never be ignored. With proper sanitization, you are 100% sure about putting a stop to the spread of germs.

Common Plaster Defects and their Cure

A home is a dream for most of us. We decorate our home in many ways. One of the ways is painting our home with our creativity and choice. Painting is usually done on the plastered surface by the following steps1. If the plaster quality is not good enough it can cause many problems later.

Plaster is a common material used in construction all around the world. Easy to work with and also easier to repair. However, there will be times when your plaster starts to show signs of wear and tear or other problems.

Understanding what type of problems can occur and its causes, you can resolve them before they become bigger issues. Today we will walk you through several common plaster defects and their primary causes & prevention.

1. Blistering of Plastered Surface

Blistering is the formation of small patches of plaster, swelling out beyond the plastered surface, arising due to late slaking (addition of water to lime) of lime particles in the plaster. This defect is usually caused due to the uneven mixing of plaster.

How to prevent it: This can be prevented by ensuring appropriate mixing between cement and it’s components used to form plaster.

2. Plaster De-bonding

De-bonding occurs when a plaster is separated from the wall. It can be caused by an excessively thick plaster layer, inadequate substrate preparation or may be due to a dusty, oily or dry substrate.

How to prevent it: To prevent de-bonding of plaster, we need to take care of the following things during plastering.

  • Remove dust & oil from the substrate before plastering.
  • Allow substrate to reach correct moisture content.
  • If necessary you should use bonding chemical.

3. Cracks on Plastered Surface

One of the most common problems you would have observed in plastering is the crack. Cracks on the plastered surface can be in different forms:

  • Crazing – It is a network of fine cracks like spider web. They are usually very fine and do not extend through the whole depth of the plaster. It occurs due to presence of excess fine content in the sand or due to dry base on which plaster is applied – when base absorbs the water and fines accumulate on the surface, it leads to crazing.
  • Separation crack at joints – It usually occurs at joints of two different materials for example at junction of RCC & Brick work. It occurs due to differential thermal movement.
  • Crack with Hollowness – This crack occurs due to hollowness in plaster. Other reasons could be extra water in the plaster mix or due to poor workmanship.

How to prevent it: Mainly cracks occur due to bad workmanship or expansion and shrinkage in the plaster during drying. Below are few tips to prevent cracks:

  • Ensure the addition of water in mortar done is by skilled mason and not by unskilled labour to ensure desired workability in terms of handling and application.
  • It can be avoided by proper curing of the plaster in order to slow down any rapid drying.

Taking care of workmanship and material quality issues will help in preventing cracks.

4. Efflorescence on Plastered Surface

When a newly constructed wall dries out, the soluble salts are brought to the surface and they appear in the form of a whitish crystalline substance. This is called efflorescence. Efflorescence is formed on plasters when soluble salts are present in plaster making materials as well as building materials such as bricks, sand, cement etc. Even water used in the construction work may contain soluble salts. It seriously affects the adhesion of paint with the wall surface and causes further problems.

How to prevent it:

  • All Construction materials used for wall should be free from salt.
  • Ensuring that the surface is moisture-free.

5. Falling Out of Plaster

This defect can happen in two forms – Flaking of plaster and peeling off plaster.

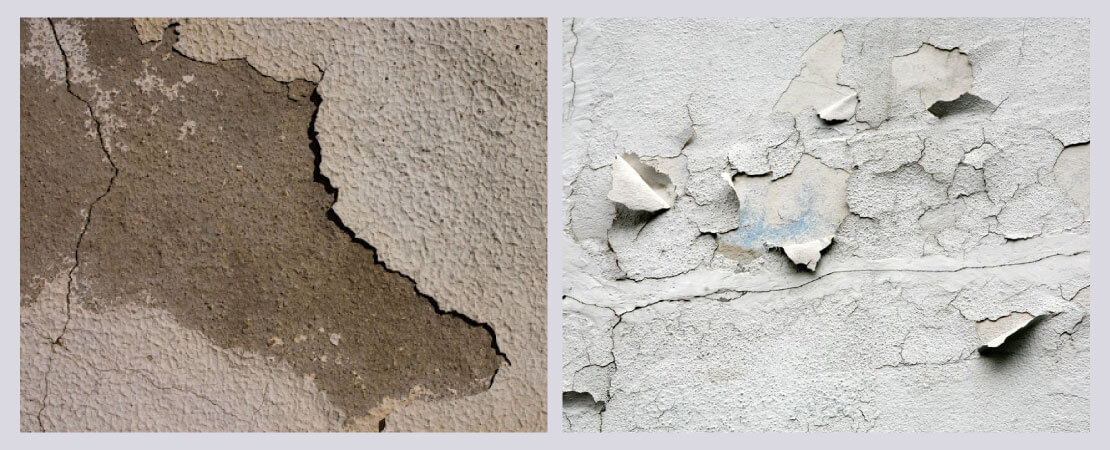
Flaking of plaster: The formation of a small loose mass on the plastered surface is known as flaking. It is mainly due to bond failure between successive coats of plaster.

Peeling off plaster: The plaster from some portion of the surface comes off and a patch is formed. This is termed as peeling. It is also mainly due to bond failure between successive coats of plaster.

How to prevent it: Both defects can be prevented with proper material selection and surface preparation. Imperfect adhesion can be minimized by good workmanship.

6. Popping of Plaster

Popping is the formations of conical like holes that break out of the plaster. It is caused due to the presence of contaminant particles such as burnt lime or other organic materials in the mix of mortar.

How to prevent it: To prevent popping in plastering, you need to ensure that no contaminant particles are present in the mortar mix.

7. Loose Plaster

When the plaster gets displaced on external impacts like application of material or tapping, etc, it is termed as loose plaster. This is caused mainly due to improper mixture and inadequate curing.

How to prevent it: It can be prevented with the use of proper mixture and adequate curing. Good workmanship will help in avoiding this problem.

Apart from the above defects, Uneven or undulation also occurs at plastered surface. The plastered surface should be in perfect plumb and without any undulations. Unevenly plastered surface happens due to poor workmanship2 of the plastering work.

After knowing the defects, read some precautions to be taken while plastering:

  • The areas that need to be plastered should be washed and kept wet.
  • All loose material sticking to the masonry should be removed before plastering.
  • The joints should be cleaned by brushing or scrapping with wire brushes.
  • The uniform level is tested with plumb-bob before & after applying the plaster.
  • Specified cement, sand ratio should be used while making cement mortar.
  • Ensure proper bonding between the surface of masonry and plaster.

Apart from these precautions, Skilled workers and good quality material should be used to minimise the defects3.

Conclusion

Plastering not only makes the surfaces smooth but gives a good finishing to the walls, ceiling and other parts of building. It is an important part of construction. To ensure good quality of plaster, it is important to know about the defects in plastering. Our objective of this content was to create awareness about various defects in plastering and its prevention. We hope this information will be helpful for you. And if you want a professional advice, then you can contact home inspection services who can inspect your property. Opting this service will give you information about issues and long term solutions for all types of defects in your home/property.

What Makes Home Inspection An Essential Part Of Living?

Home is not just brick and mortar. It is where our soul finds peace. It is the place which makes us happy, secured and comfortable in a world of billion people. But as we grow and change the bits and pieces of our life we often tend to ignore things that ensure the longevity of this abode of peace. We are either busy mending its exterior or beautifying its interior. We simply do not look deeper. Majority of the people in India are not familiar with the idea of the home inspection. Ask your neighbour Malhotra Ji, he will tell you about everything from buying a property to getting the best electrician in the area. But ‘home inspection?’ – Well, you can almost visualize the clueless expression on his face.

Inspection of the home is a service area that needs to be explored in our country for better living, prosperity and growth. Even if people are aware of the theoretical part of the home inspection they have hardly travelled the road in reality. This article will help you to gain insight into home inspection and push you towards a path you will never regret.

What is a home inspection?

Professional home inspection is a process through which condition of your home or property is examined thoroughly by certified home inspectors. All accessible areas of your home, for example, wall, ceiling, floor, doors, windows, plumbing & electrical systems and alike are examined to identify the existing or possible issues /damages and give long term solutions.

In simple terms, home inspection means the Health and safety Check Up of your Home or Property. To understand its area, elements, coverage, 3D of issues; read So What exactly is Home Inspection?

What is the significance of home inspection?

Most common problems in Indian homes are damp, leakages, excess amount of moisture as also electrical accidents, fire and safety hazards. Damp is a major cause of worry, as the reason being that India has a humid climate which affects a property be it old or new. Besides, faults or issues in the building also tend to become problematic with years. Hence, it is essential to have the right kind of technology that keeps you ahead in your home game. Here is why a home inspection is a boon in your life.

Saves your property and family

Inspection is a great way to become aware of the areas of the house that can act as a hazard or create problems in the future and also suggest solution for it. Let us give you examples – There is a negligible crack in the wall near your window. You notice it, ignore it for some time or plan to postpone it till the next painting session. What follows next? – A damp patch, an obvious sign of seepage, and swelling of the wall paint. Worse happens when dots of fungi start appearing on the damp patch.

Now let’s talk health.

Don’t we really know that germs flourish in damp conditions? Dampness on the wall not only spoil the look of your home but impacts the health of your family too. But we are happy to take anti-allergic pills and use inhalers regularly thinking there is no choice. Why not take a definitive step now and get to the root of the problem with the help of home inspection.

Find salient and hidden defects of the home

No home is perfect. Your home can also be the safe haven of one or many hidden defects. As you already know that every house has seven basic elements (walls, ceiling, floor, doors, windows, plumbing and electrical). These elements can conceal issues which can create serious threat in the proper functioning and safety of your home. So protect your home from masked hazards.

Save you from future repair and maintenance costs

With the help of home inspection,you will get aware of issues and solution. Getting issues rectified on time can save you from further associated problems.

Issues pointed out by the home inspector should be considered because something as small as a leaking pipe could turn into a bigger problem later.It is better to fix a problem when it is small than to wait and let it become a bigger problem.Repair and maintenance costs go up all the time. Also add to that the cost of material also keeps increasing all the time. Last but not the least, the amount of inconvenience caused by a repair work is also a factor.

Hence, in long run it will save future repair & maintenance cost as well as give you a peace of mind.

Makes life better

When our house is falling apart or when we don’t feel comfortable in it, the standard and the spirit of living a good life evaporates. Our surrounding acts as a promoter of a healthy mind. A home inspection is one such initiative that opens doors of possibilities and allows us to fix the errors and have a better home along with life.

Keeps accidents at bay

Accidents are unpredictable events. But what about getting the opportunity of identifying areas that can cause an accident? Wouldn’t you like to take serious actions and extinguish the possibility of an accident? If it’s yes then home inspection is what you need right now.

Basically, Home inspection detects the unsafe areas of home. Safety is one of the key aspects that a home inspector focuses on during an inspection. It is the need of the hour to have a safer home.

So, only a homeowner needs a home inspection, right?

Wrong. You need a home inspection if you are a home or property buyer, home seller, interior designer, real estate developer or real estate consultant or are in any relatable profession. A home inspection can be beneficial for you in a number of ways. Even your office / shop / school / showroom, etc needs a thorough property inspection.

What is the process of a home inspection?

A home inspection is not only about home inspectors arriving at your door checking the house and walking out. It is a procedure that is followed step by step by trained professionals. Let us understand it very briefly.

It can be best explained in 4 phrases:

  • Areas: All the areas of your home e.g., bedroom, bathroom, living area, dining area, kitchen, balcony, loft, terrace, servant quarter, etc are inspected.
  • Elements: All the 7 elements (wall, ceiling, floor, door, window, plumbing, electrical) of each area as all any additional element is checked.
  • What is Inspected? The condition of the house and other important details is looked into. These include types of materials used, finishing& installation, operation & functionality.Last but not the least, safety aspects are also reviewed.
  • 3D of Issues: The process of inspection results in:
    • Detection of the issues / problems
    • Describing the issues.
    • Directing the solution to each issue / problem.

The working procedure of the inspectors may vary from the company to company and their policies but the central idea of creating a safe and secured shelter remains the same.

Watch the video to get a clearer idea:

Now, that you know about home inspection and its numerous benefits, it will be easier for you to formulate better decisions when it comes to your space. Always remember time, choices and decision matters. So watch your steps and support constructive and comprehensive approaches that will help you to keep your home healthy and safe.

6 Staircase Safety tips for Homes/Offices to prevent from Slips, trips and falls

Staircases are being used from the ancient times and the importance of the staircase remains the same even in the 21st century. These are very common walking surface in most workplaces, residential complexes and individual homes.

The Staircase is an important component of a building which helps in commuting between floors and roof. Improperly designed staircases can cause falls which may lead to severe injuries or accidents if the necessary guidelines are not followed properly. A combination of deficiencies in design, lighting, maintenance and others are usually the culprits in stairway slips, trips and falls.

Let us first understand some of its basic parts. Staircase typically consists of:

  1. Landing Platform
  2. Handrail or Stair Rail System
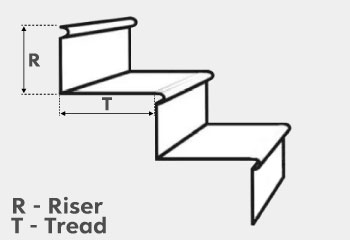
  3. Steps (Riser & tread) – A step is composed of tread and riser. Tread is the horizontal top surface to press beneath the feet. The riser is the vertical portion between each tread on the stair

To prevent falls or accidents due to staircase, below are some informative tips for safer stairway design, maintenance and use etc:

1. Optimise Riser and Tread Design

Trips and falls that occur during stairway ascent are often attributed to variation in the riser, tread. Stair riser heights should be 7 inches maximum and 4 inches minimum & tread depth to be minimum 10 mm. To know more, click here1.

Ideally, all tread and riser dimensions should be uniform throughout the entire stairway. When we use stairs, we tend to follow the same steps again and again until we reach on a plain surface. So, make sure that there are no uneven steps in your staircase and all steps areof the same size.

2. Do not neglect Stair rails or handrails

Stair rails and handrails are needed for very different purposes. Stair rails protect pedestrians from falling off the edge of the stairs or landings while handrails help pedestrians keep their balance and provide leverage when ascending or descending stairs. They greatly reduce the chance of a fall, they are strongly recommended, regardless of the number of steps.

You need to install stainless steel handrails that are slip-resistant because they can provide you utmost support and they need less maintenance cost. And, if you already have handrails, check its functionality.

3. Eliminate Tripping Hazards

Firstly, these can happen due to distinct level difference at the transition area between the entrance of staircase and other associated area at office or individual home or lobby at the residential complex. Secondly, we tend to keep a lot of items around stairways that are major tripping hazards. Here are a few to be mindful of:

  • If electrical cords are left open, use some tape to pin electrical cords along the baseboards, so that it is out of the way.
  • Furniture near or on the landings should be rearranged to keep pathways free.
  • Do not store anything on the stairs, even temporarily. While there is plenty of decors that can add to the aesthetic of your stairs, but remember it all increases the risk of falls.

4. Prefer Anti-slip Surface

This is one of the most important factors that can prevent accidents. The staircase should be made with slip-resistant materials, otherwise, can be dangerous especially for children and elders. You can reduce the risk of the slip by using anti-slip materials in the stair treads and landing surfaces.

People often use anti-slip materials on the leading edge of the treads to prevent slip-related incidents. Slip-resistant or anti-skid paints2 are also available and you can use them on your staircase.

5. Ensure better Visibility

Staircase should be illuminated by enough lighting so that users can watch each and every step precisely. If you have children and elders in your family, you should not compromise with your lighting system, because better visibility will ensure safety for your dearest ones. Low light can be an issue for the elders and it can prevent them from noticing steps clearly.

6. Maintenance and Use

Many stairway accidents occur due to poor maintenance, non-attention and use. Keep stair treads clean and in good condition. There can be rusted handrails, loose fasteners resulting in the further deterioration with time. If left unattended can lead to accidents or injuries.

Apart from these, there isa last tip which can only be followed by individual homes i.e Install Safety Gates for Babies & Young Kids – If you have little ones roaming around, place child safety gates at the top and bottom of your staircase, so that they cannot access it by themselves.

Conclusion

The fact is, most falls can be prevented; and that prevention starts by acknowledging that there are always risks when using the stairs.By implementing simple strategies, keeping your stairs in good shape, and staying focused, you can help put an end to falls and serious injuries in homes and offices3. Also, read how to use stairs safely4.

We hope this content is helpful in creating awareness about safety of your staircase. If you still want to take professional advice for checking its safety and other problems, you can click here.